


Alice In Wonderland Trinket Dishes
OK you guys, this has to be my favorite DIY yet. Considering I'm only three posts in, there wasn't much to beat. But if you're like me and you love Disney and all Disney things, I think you'll enjoy this one, too.
I've had a Disneyland pass for as long as I can remember and from when I was a kid until now, one of my favorite rides has always been Alice in Wonderland. From the colorful caterpillar cars to the whimsical Mary Blair style I love so dearly, I just felt like I had to try and recreate that magic somehow at home.
So here we are, making Alice In Wonderland inspired trinket dishes of course! This DIY is definitely a little bit advanced, but don't be scared to at least give it a try. I'm no clay expert and mine definitely have their imperfections but I'm still super proud of them.
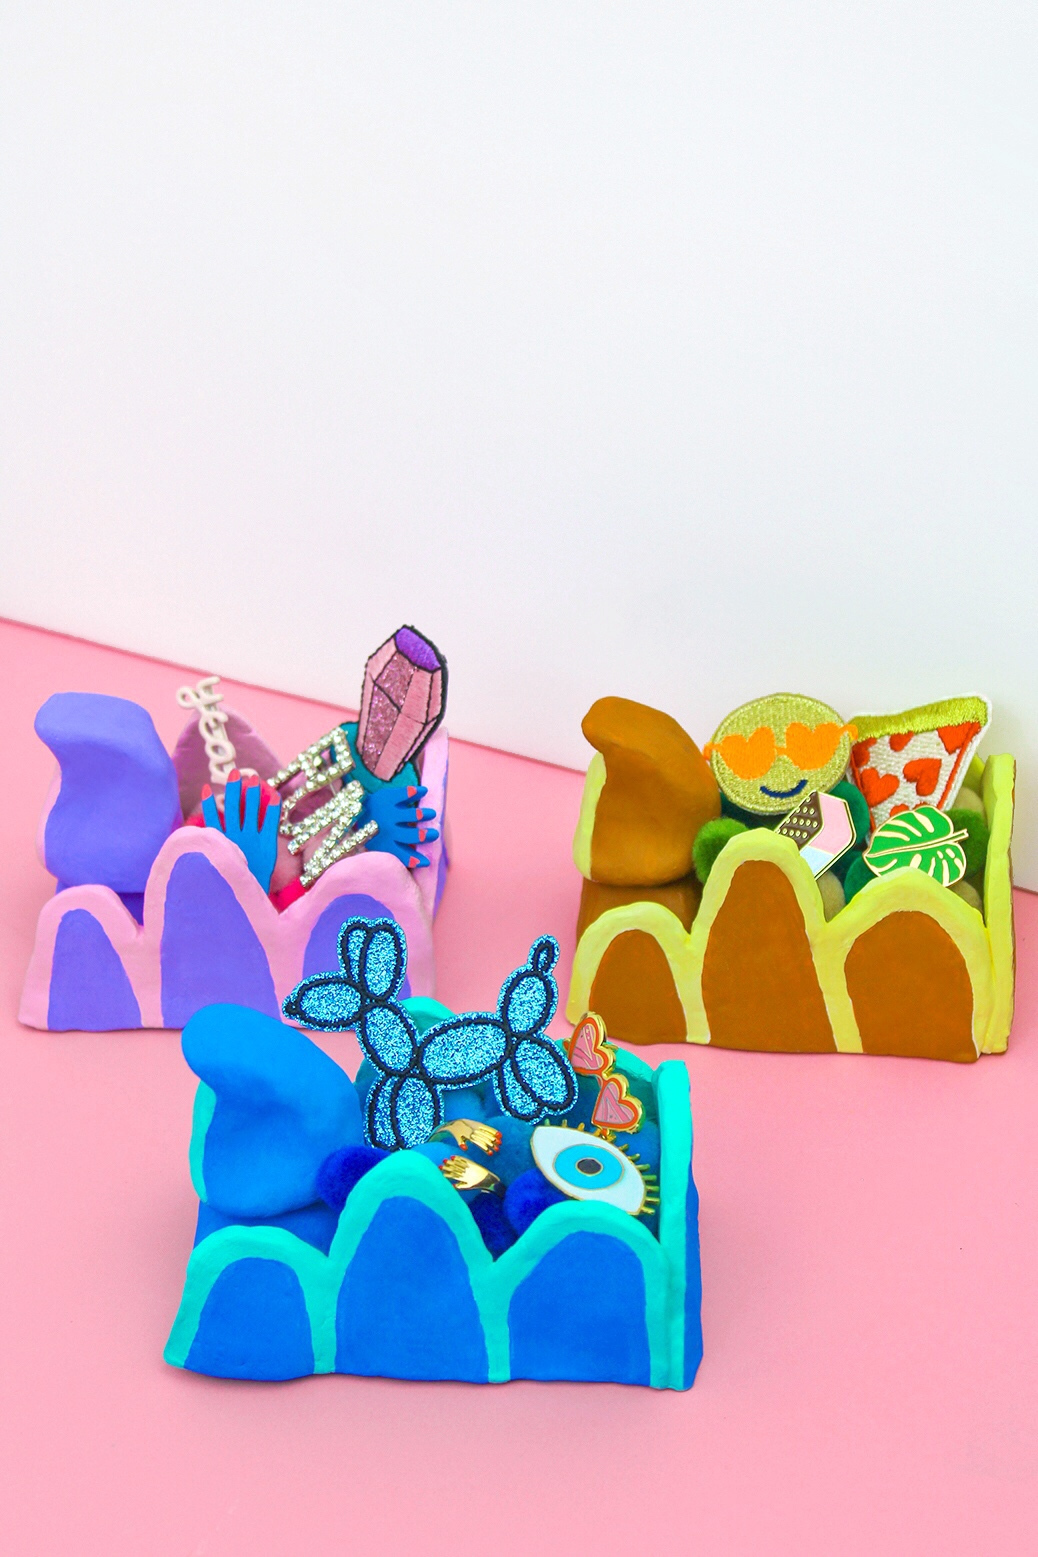
Plus, you wind up with what are possibly the CUTEST trinket dishes for all of your patches and pins ;)
What You'll Need
Paint
Paintbrushes
Water
Glue

How To
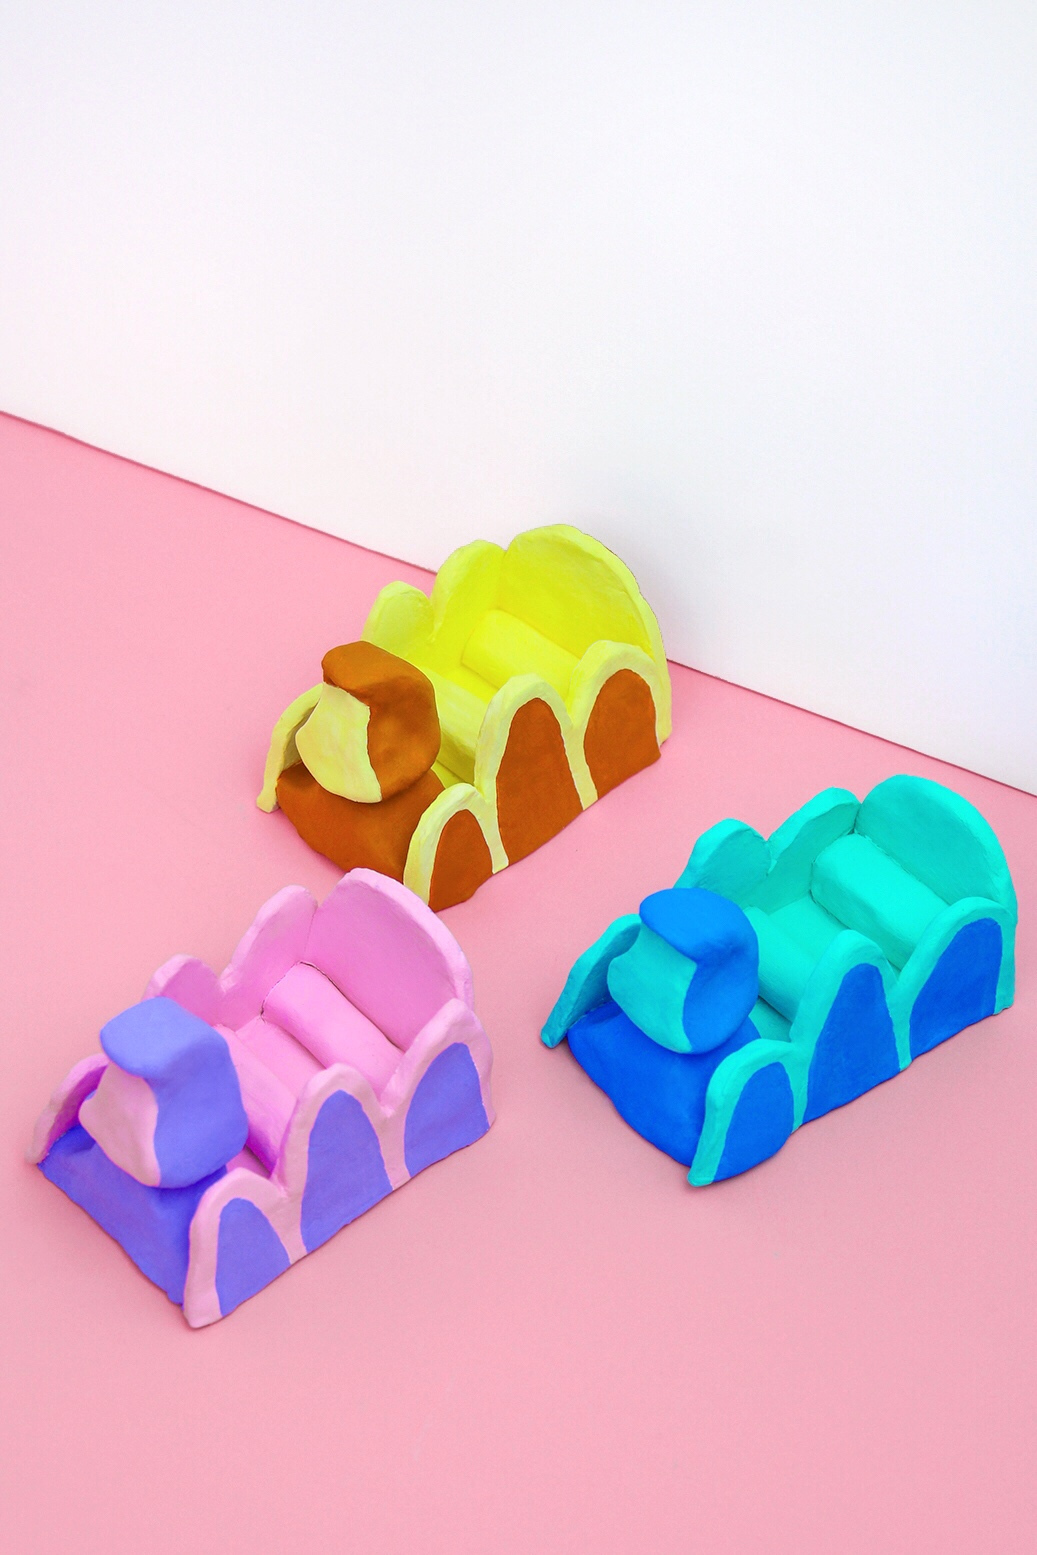
1) Mold the shapes from the image below out of clay. You should have two side pieces with 3 humps, 2 logs for the ride seats, a mound for the head to sit on, a head piece with a hair curl on top (you will just need to eyeball this to fit on top of the mound), a rectangle for the bottom base, and a sort of half circle for the back.
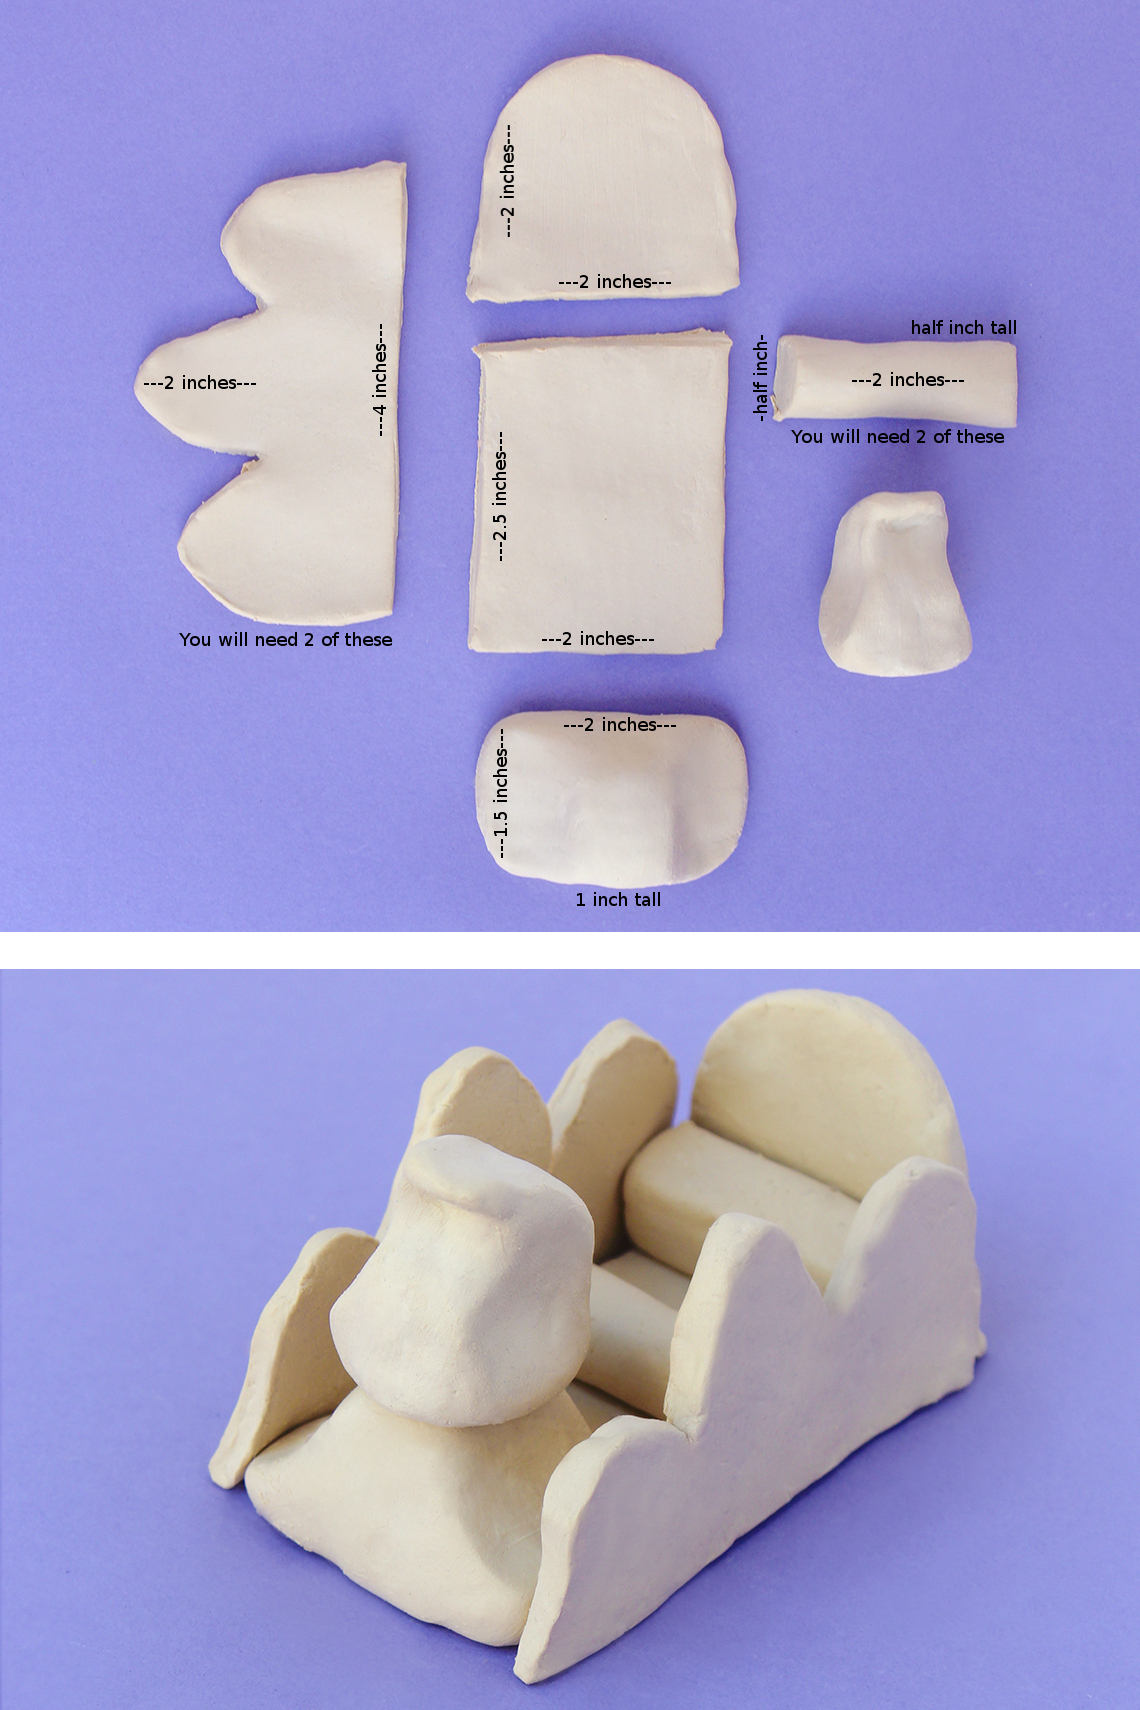
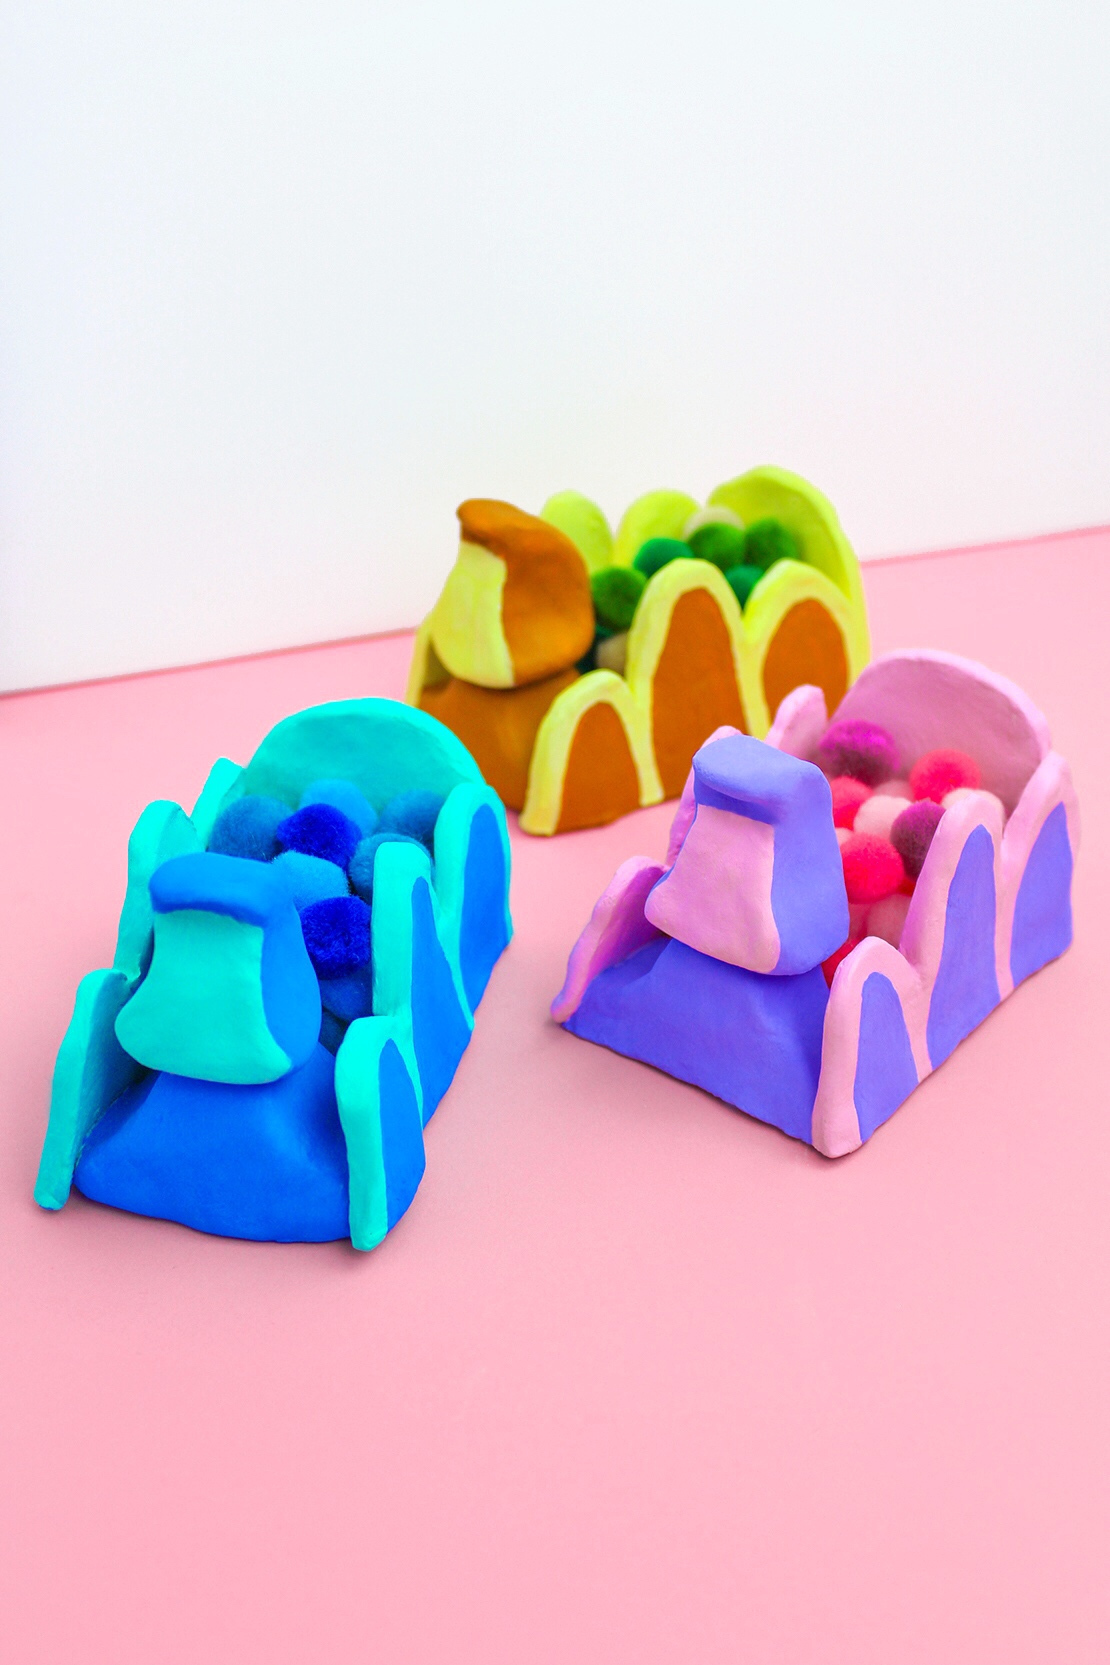
2) Once you have made all of your shapes, start assembling as soon as possible by mimicking the second image above (everything except for the head - that will go on way later). Don't wait for the clay to dry! Working with Crayola Air Dry Clay, I was able to use a wet paintbrush to sort of mend together any gaps and smooth out any imperfections. It was like gluing the pieces together with the wet paintbrush. I did this until I felt as though all pieces were connected pretty well. This step is very crucial because it's the reason all of the pieces stick together.
3) Allow the clay to fully air dry. This may take a day or two, just check on it periodically.
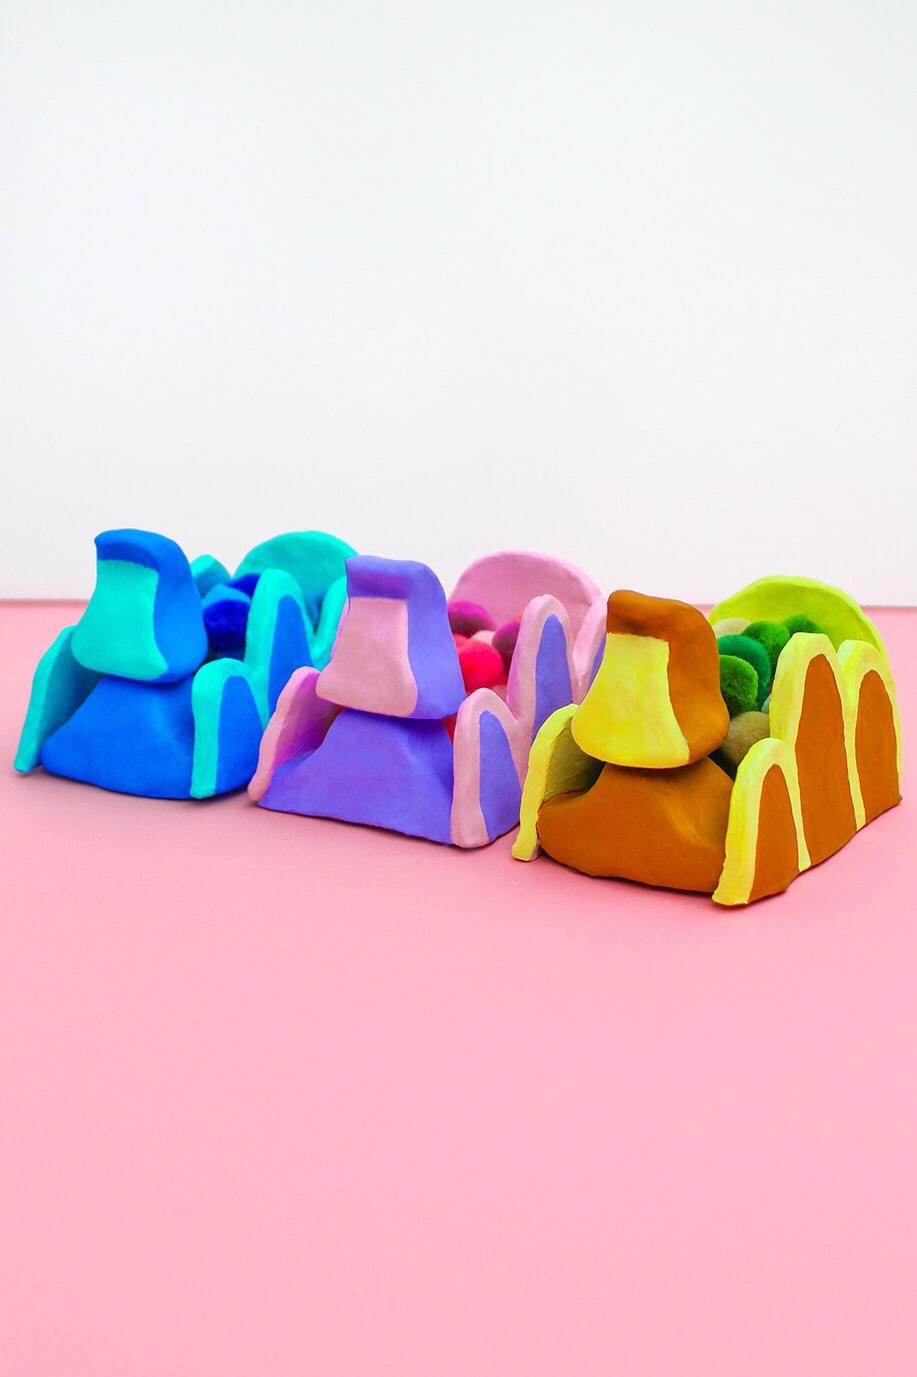
4) Once the clay has dried, you can paint the pieces your desired colors. Don't forget to paint the head, too - but don't attach it yet!
5) Once you have painted your pieces and have let them dry, you can glue on the head.
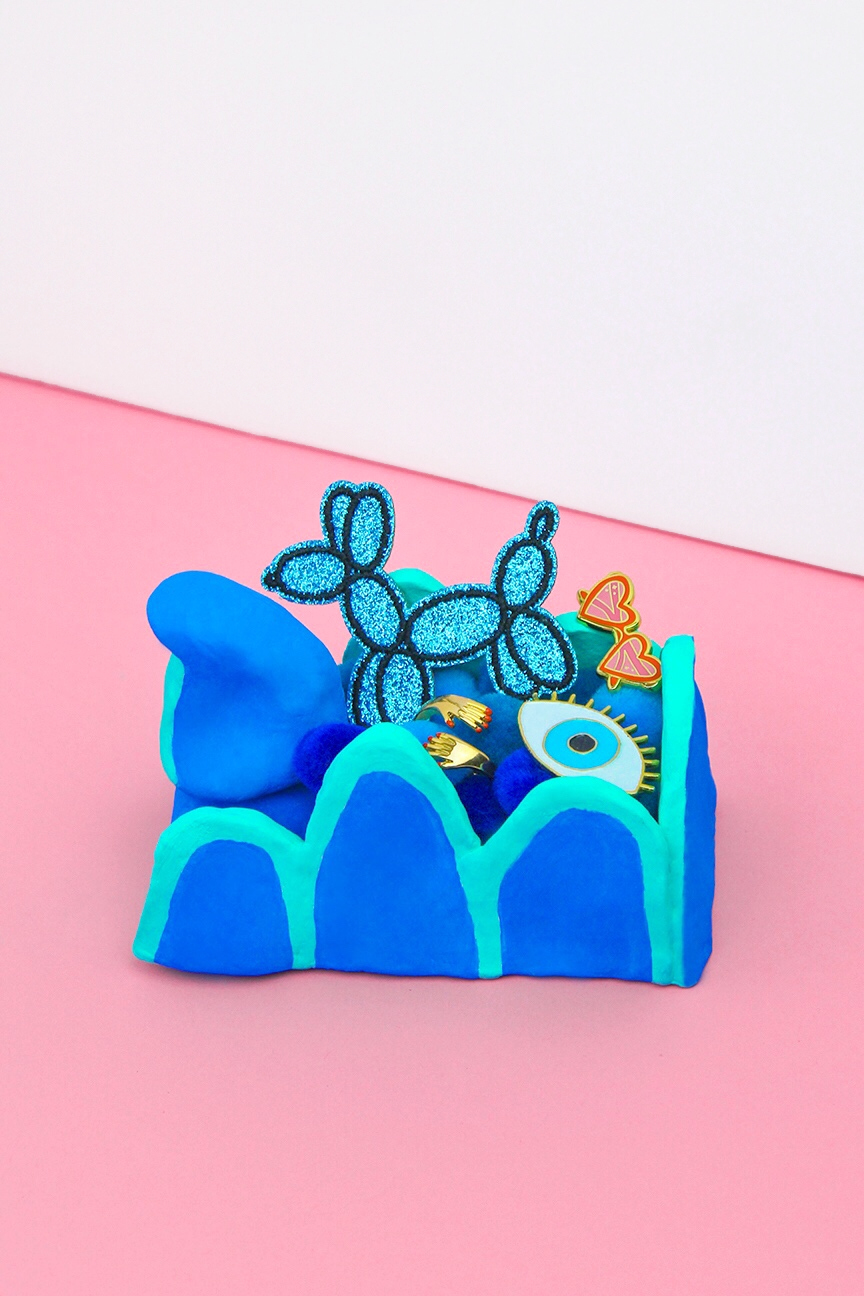
6) Put pins, patches, or any other trinkets in your caterpillar and you're all set to wander into Wonderland...

Be sure to tag me and use #crafterward on Instagram to share your creations with me!


Comments: