


DIY Coffee Cup Gift Wrap
Where are all my coffee lovers at?!
I’ve been wanting to do a creative gift wrap tutorial on the blog for some time now and when I thought of this DIY Coffee Cup Gift Wrap, I knew I had to share it with all of you!
I’ve partnered with Beacon Adhesives to bring this project to life and what I love most about it is how versatile it can be! With a little creativity, you can easily transform this craft into a cup of tea, hot chocolate, or even a pumpkin spice latte if you please (yes, I am in full Fall mode over here). Keep on reading for the full how-to! 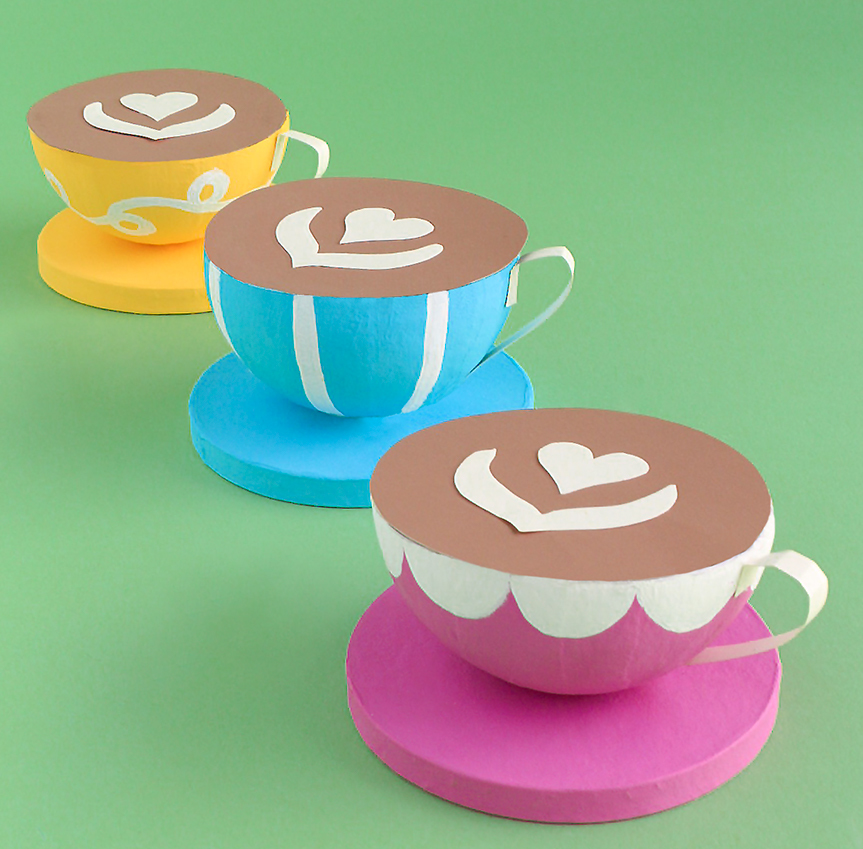
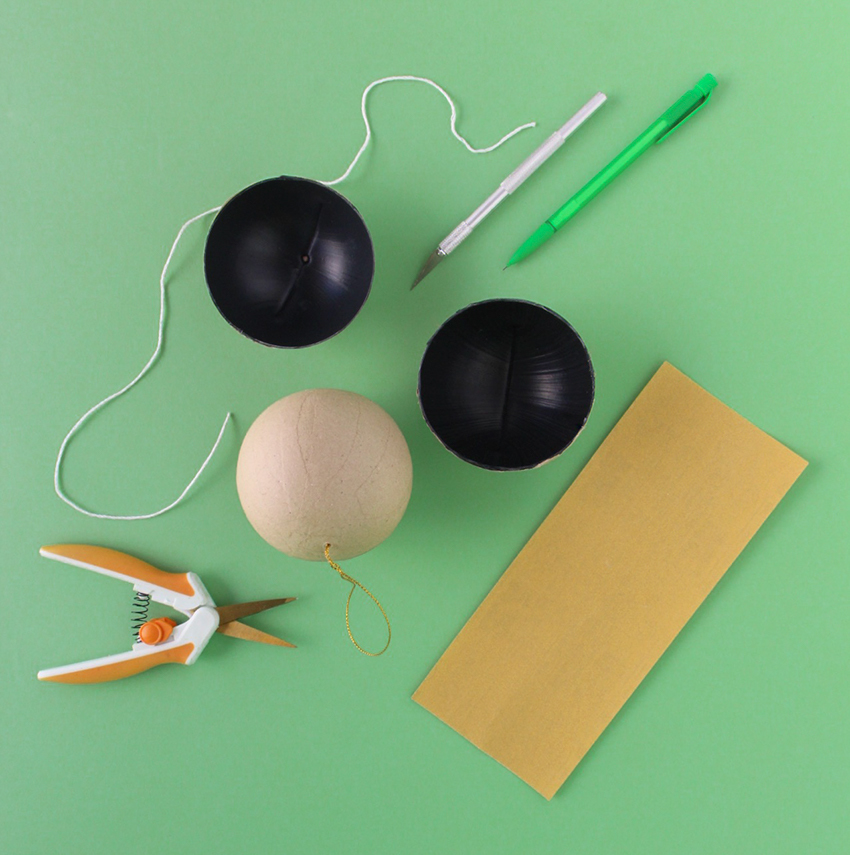
What You'll Need
Paper Mache Round Ornament
Sandpaper
String
Pencil
Small Craft Knife
Small Precision Scissors
Paint + Paintbrush
White + Brown Cardstock
Scotch Tape
How To
 Step 1) Carefully pull the ornament string out of the ball shaped paper mache ornament. Then, wrap a string all the way around the ball as close to the middle as you can. Use the string as a guide to trace a straight line all the way around the ball. Then, VERY CAREFULLY use a craft knife to cut the ball in half using the line you just drew as a guideline. Once you get a good chunk cut with the knife, you can finish it off with a pair of precision scissors. Use a piece of sandpaper to smooth out the freshly cut edges.
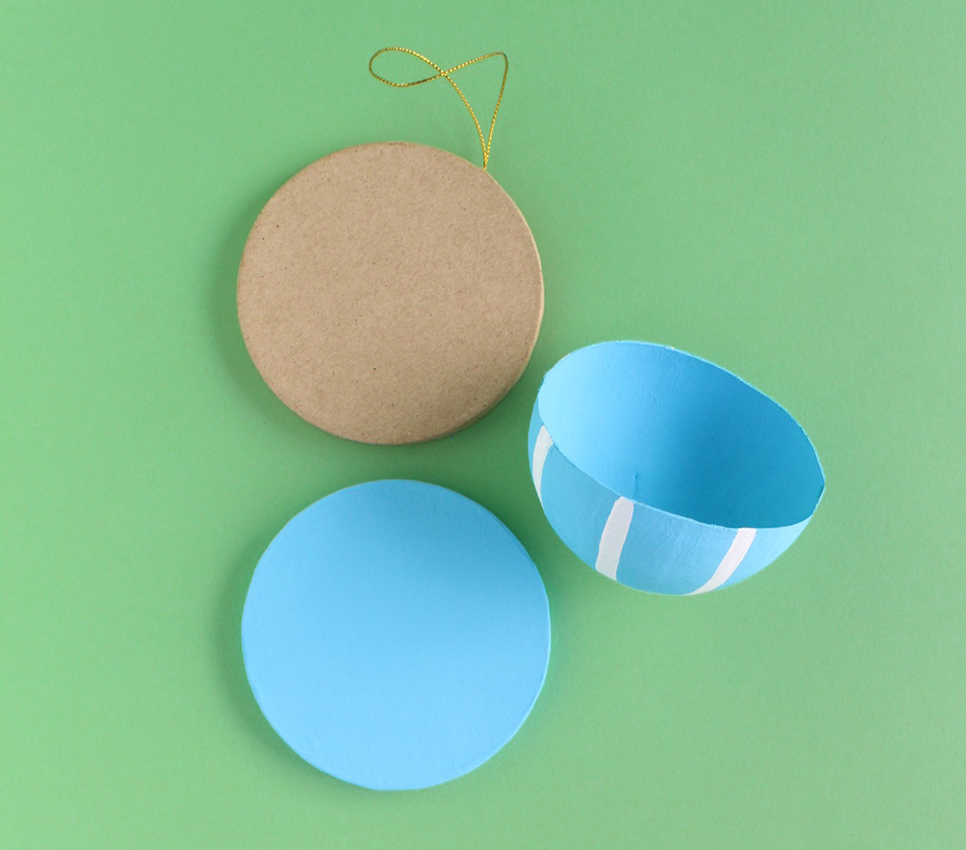
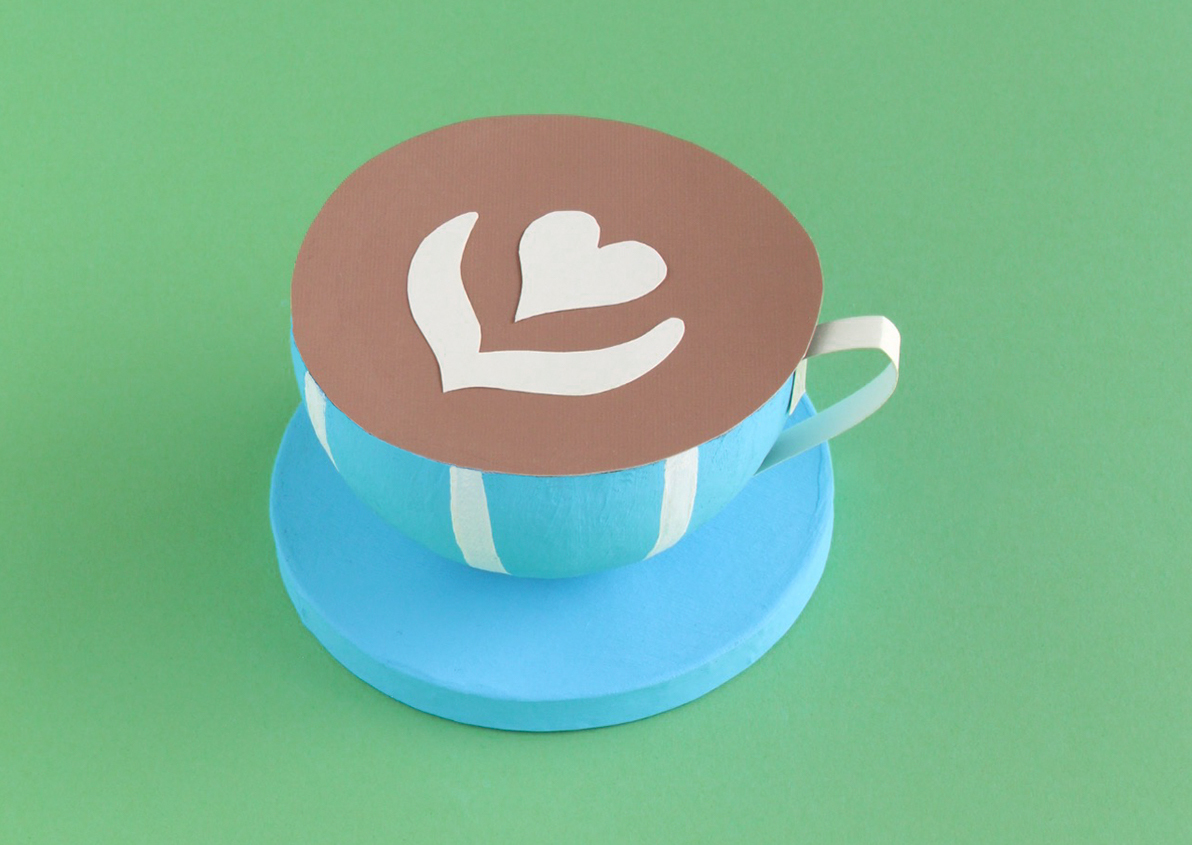
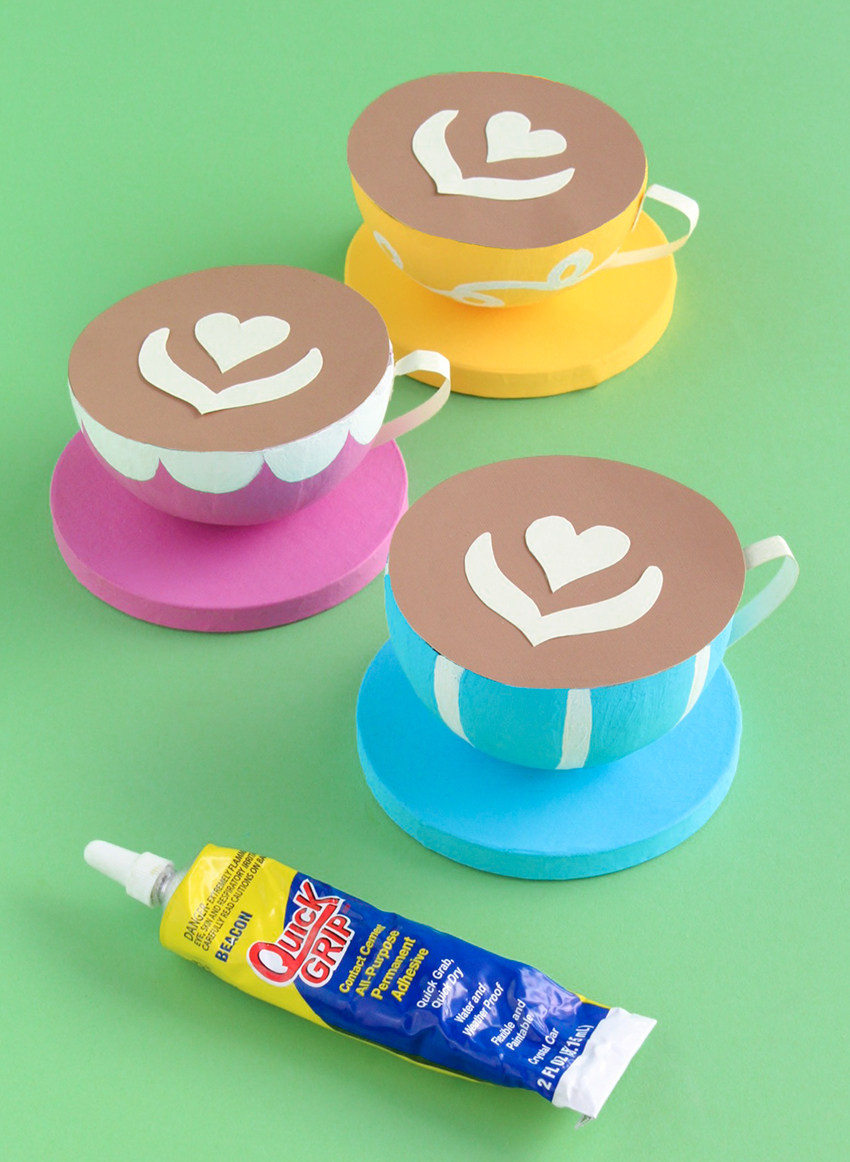
Step 2) Paint the inside and outside of what is now your cup any color you like. Then, grab your round paper mache ornament, carefully pull out the ornament string, and paint it the same color as your cup.
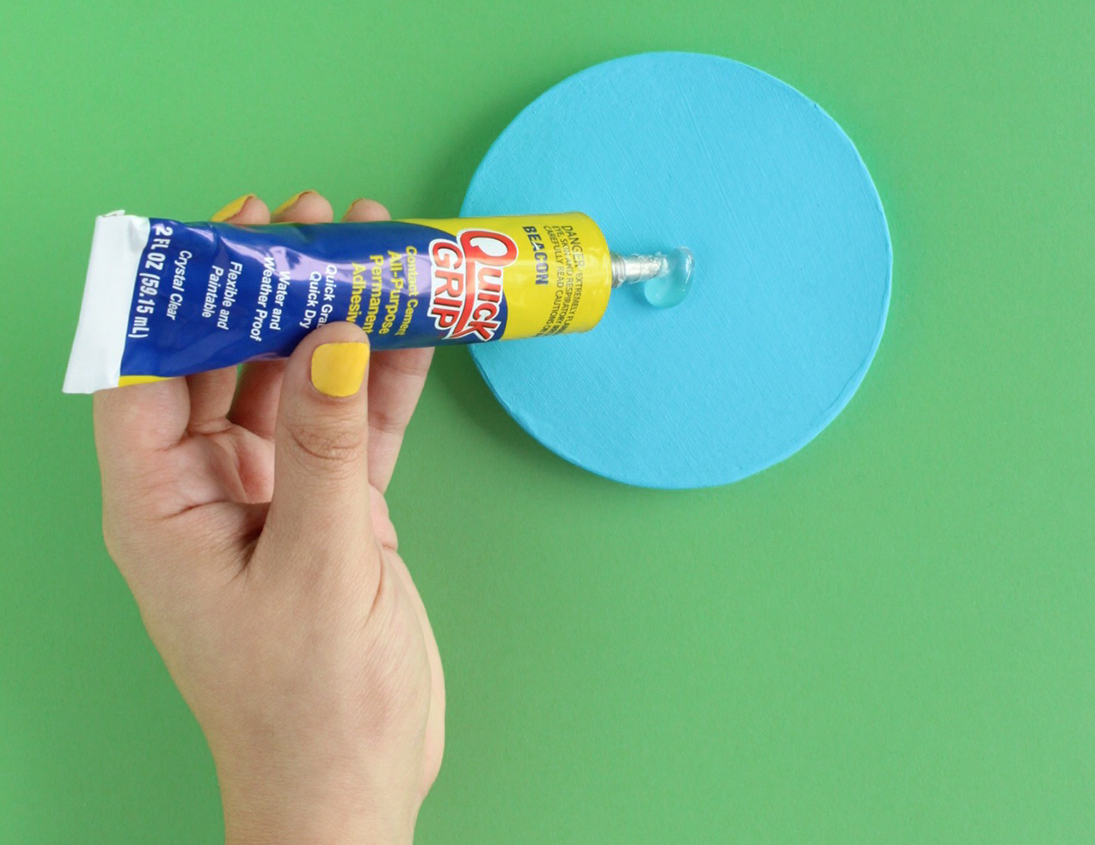
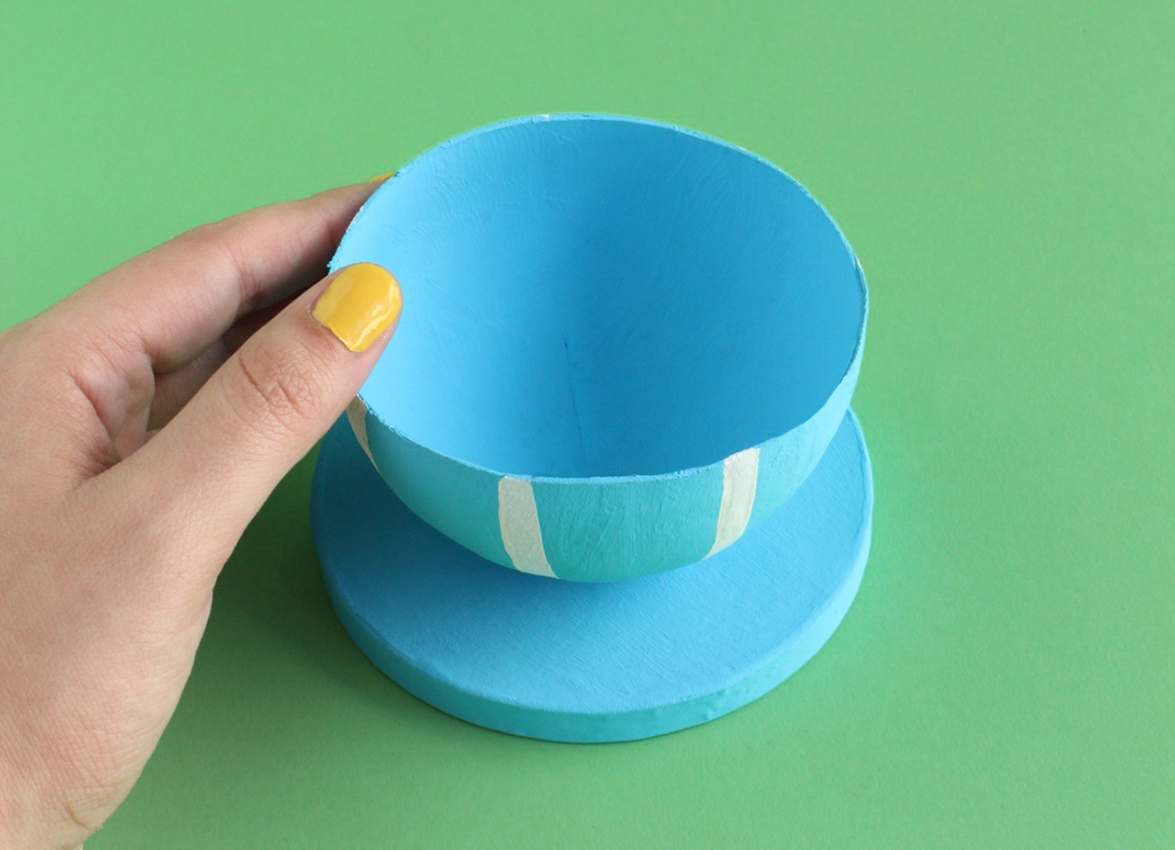
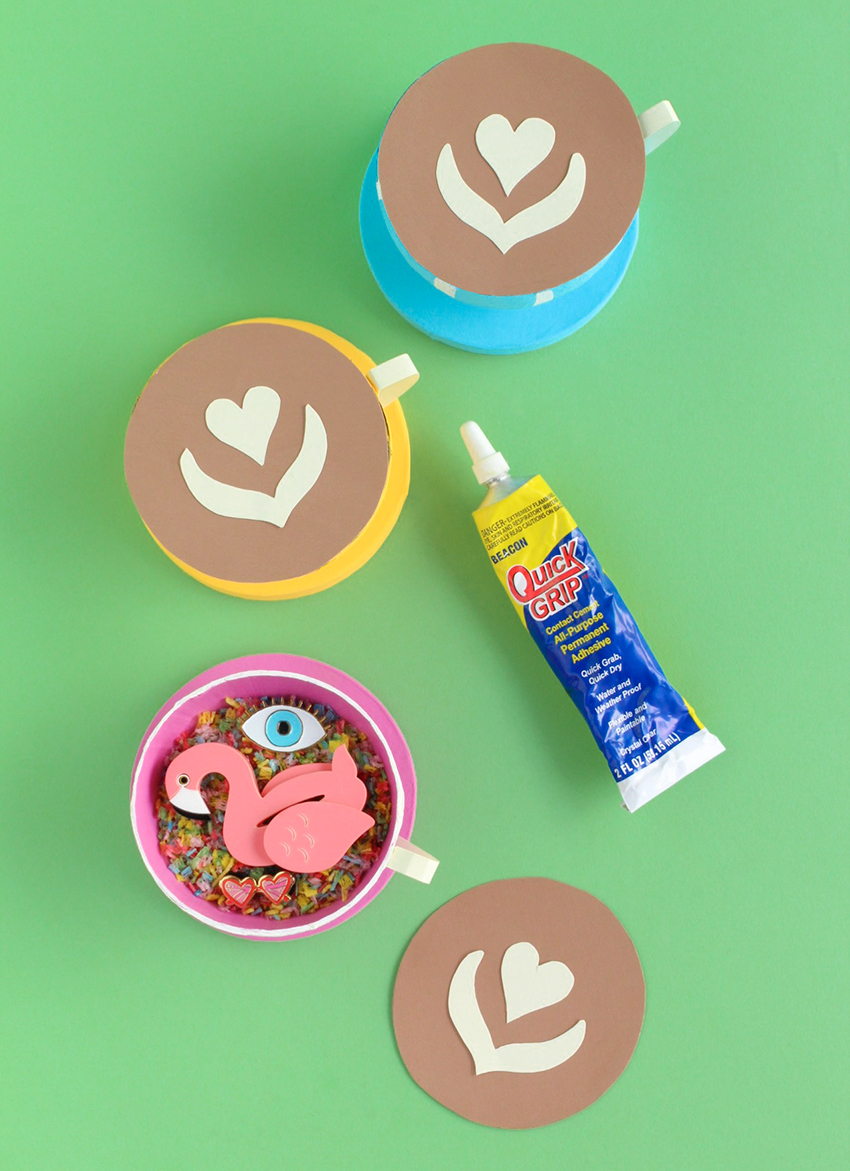
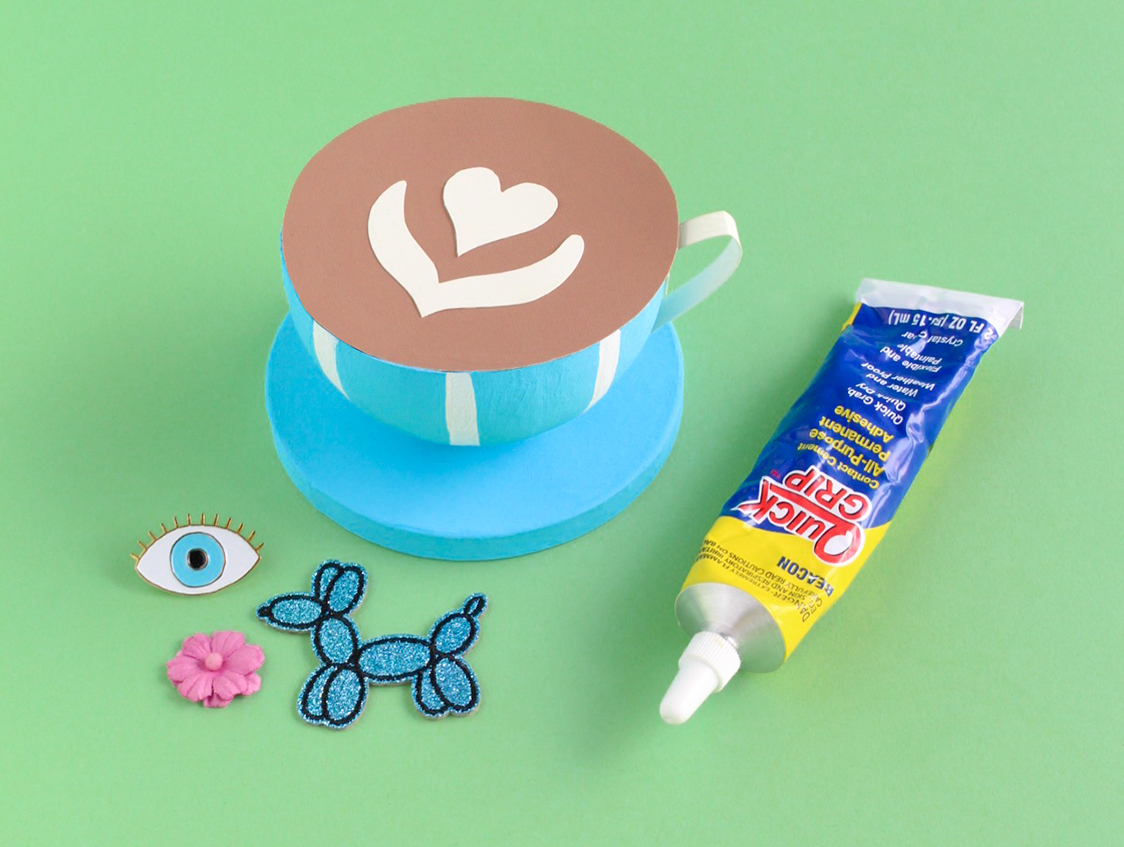
Step 3) Place a dollop of Quick Grip glue onto the center of your round paper mache and attach the cup to it. I suggest holding the cup in place over the glue for about 30 seconds for it to form a strong grip.
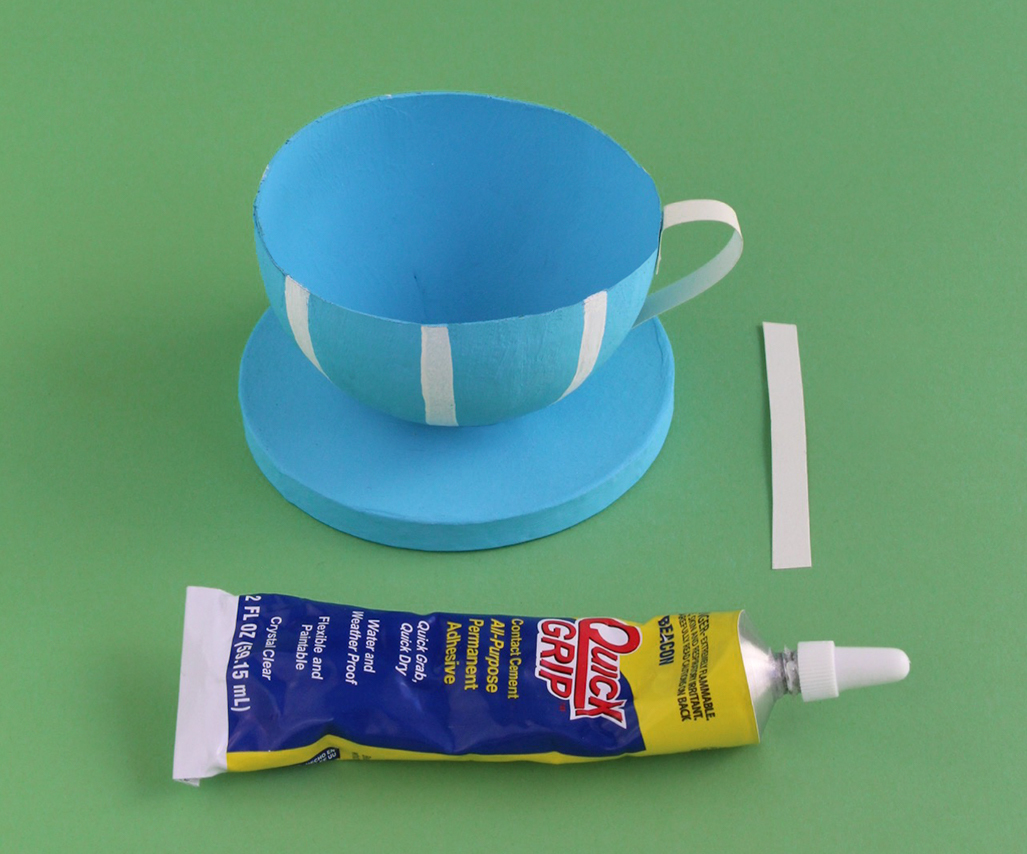
Step 4) Grab your white cardstock and cut a skinny rectangular piece out of it. Use your Quick Grip to attach it to the cup as a handle.
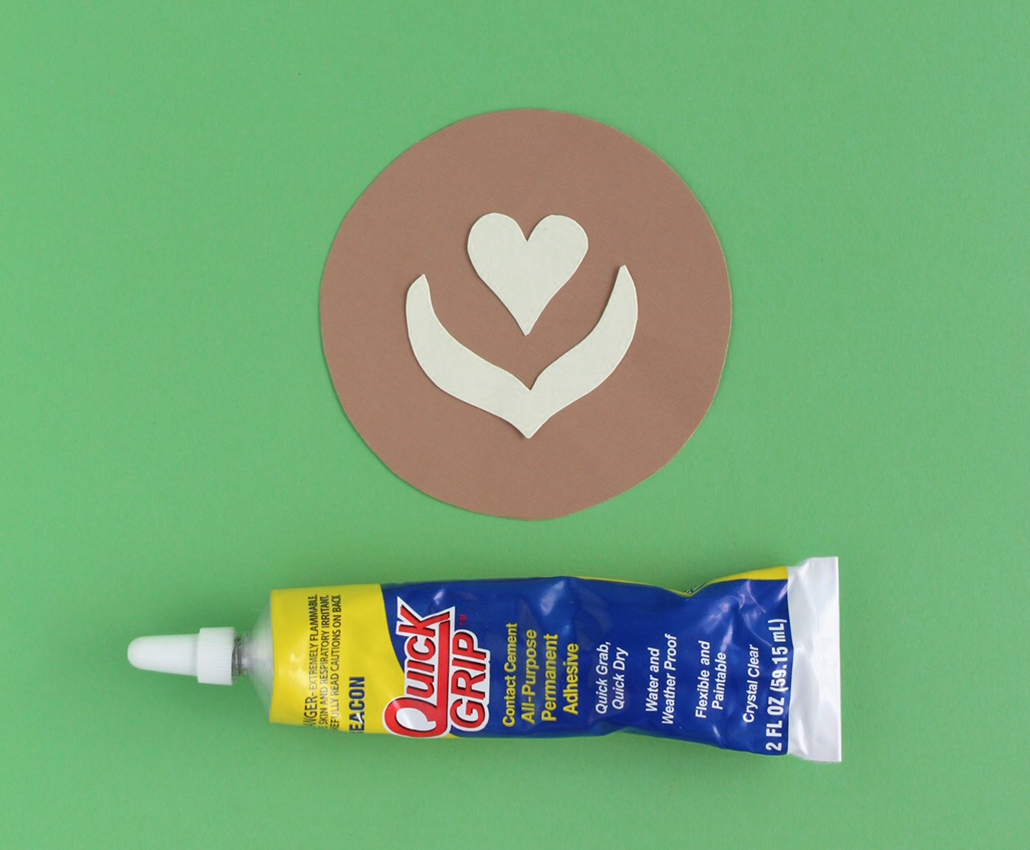
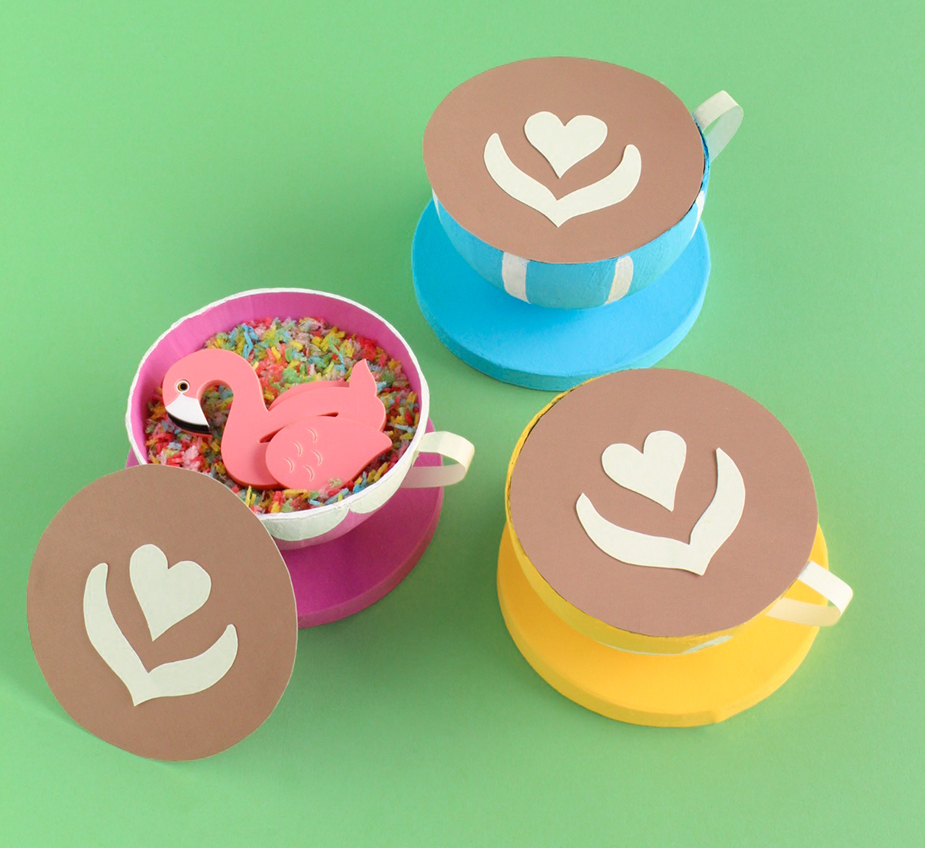
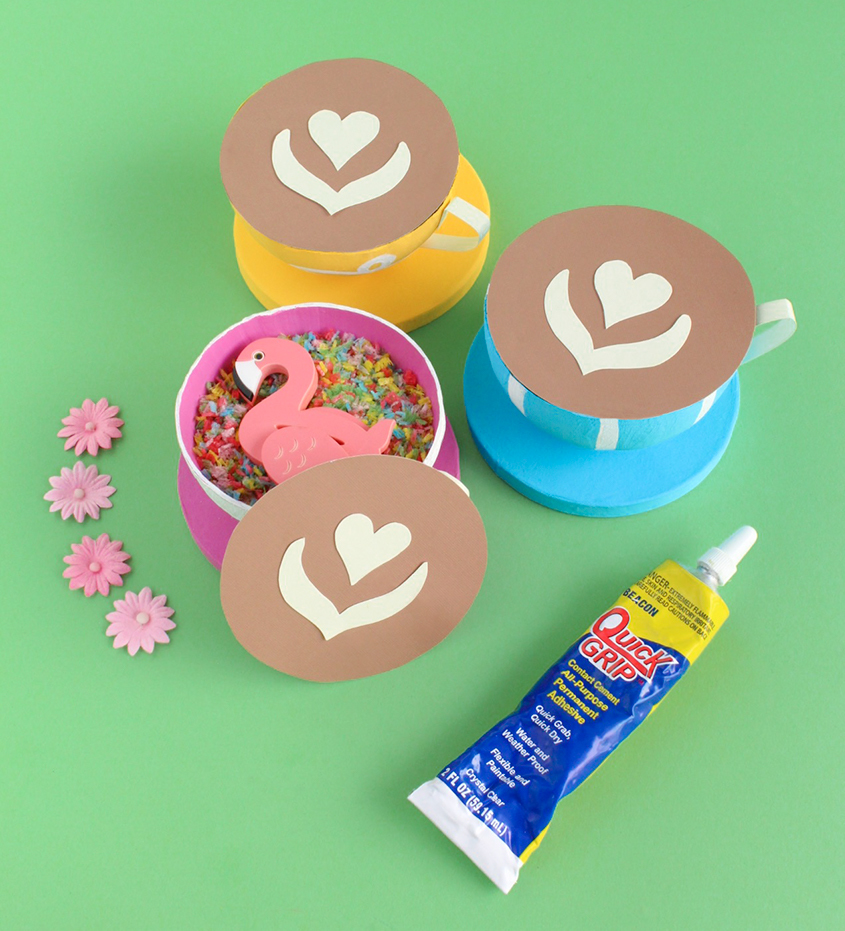
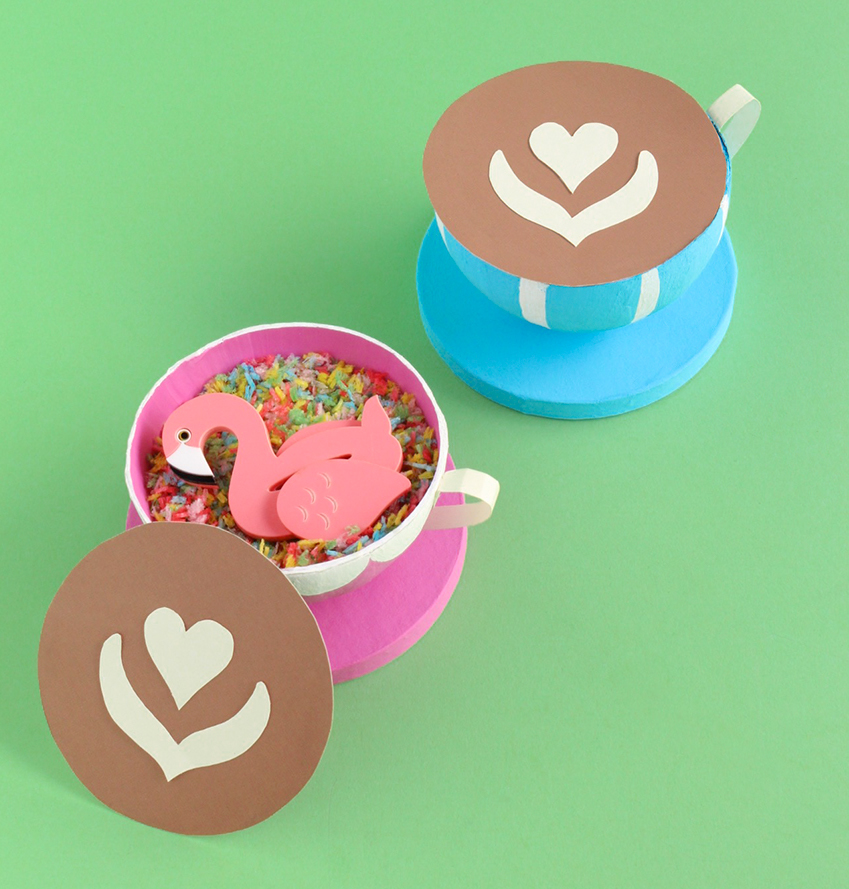
Step 5) Flip your cup over onto a piece of brown cardstock and trace the circle onto the cardstock. Cut out the circle and use white cardstock to draw and cut out a latte design as well if you desire. I kept my design pretty simple. Use your Quick Grip to glue the latte design onto the brown coffee circle.
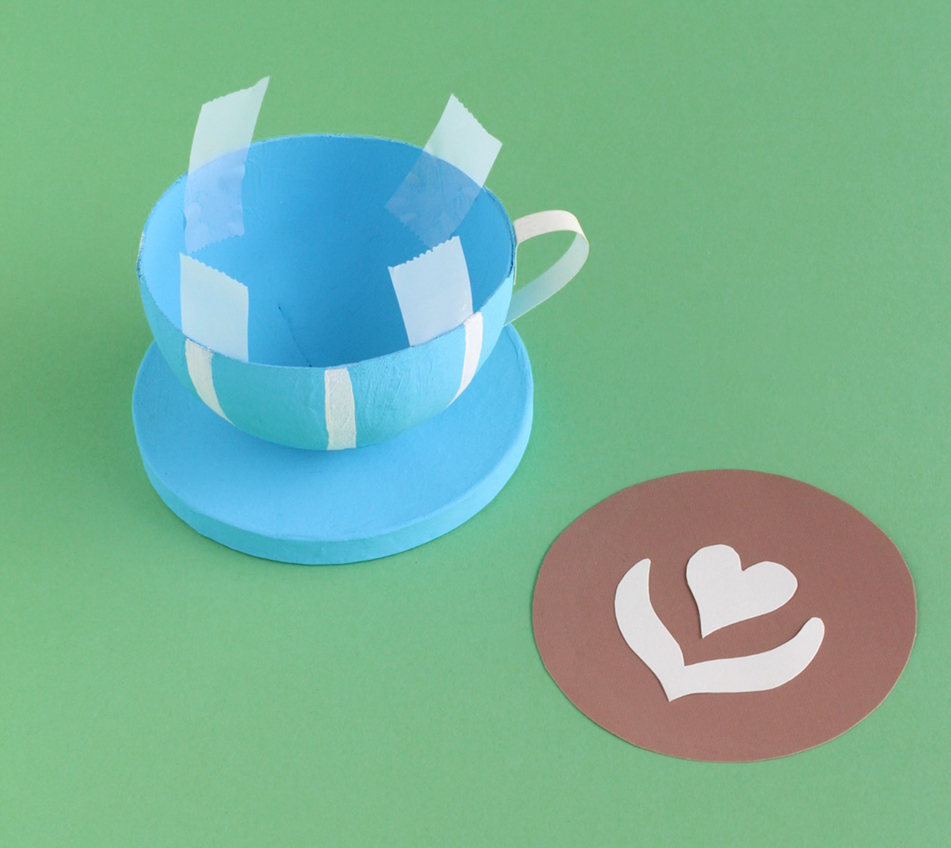
Step 6) After you have filled your coffee cup with small trinkets/gifts, place 4 pieces of tape onto your cup as shown in the first image above. Then, fold the pieces over and attach the brown coffee top. Now you’re set to gift this to any coffee lover!
This post has been sponsored by Beacon Adhesives. All opinions are my own.


Comments: