


DIY Trinket Shelf & Key Holder With Sculpey Premo
This is a sponsored post written by me on behalf of Polyform Products. All opinions are 100% my own.
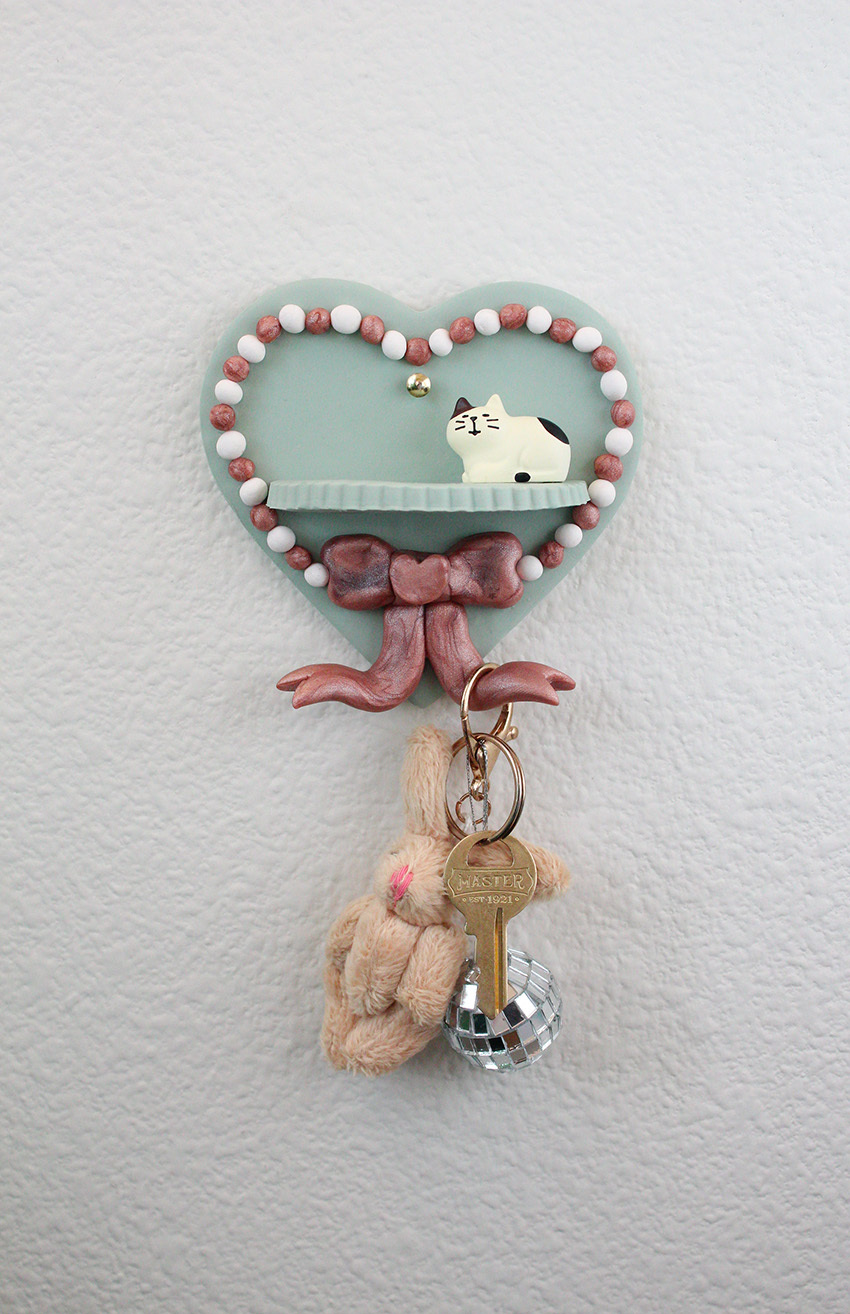
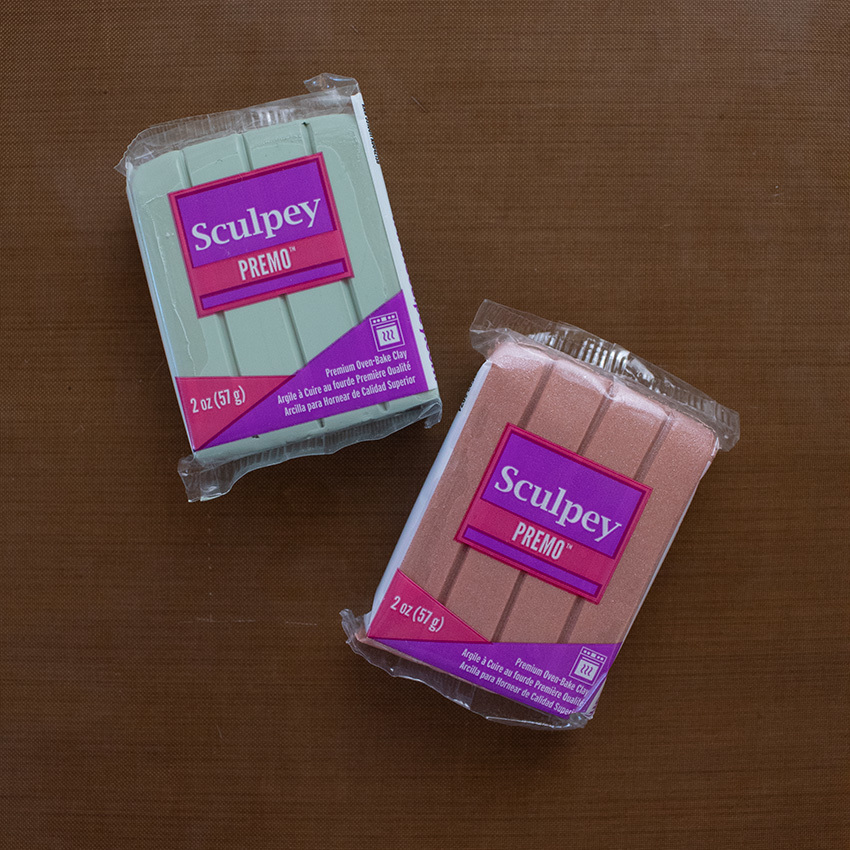
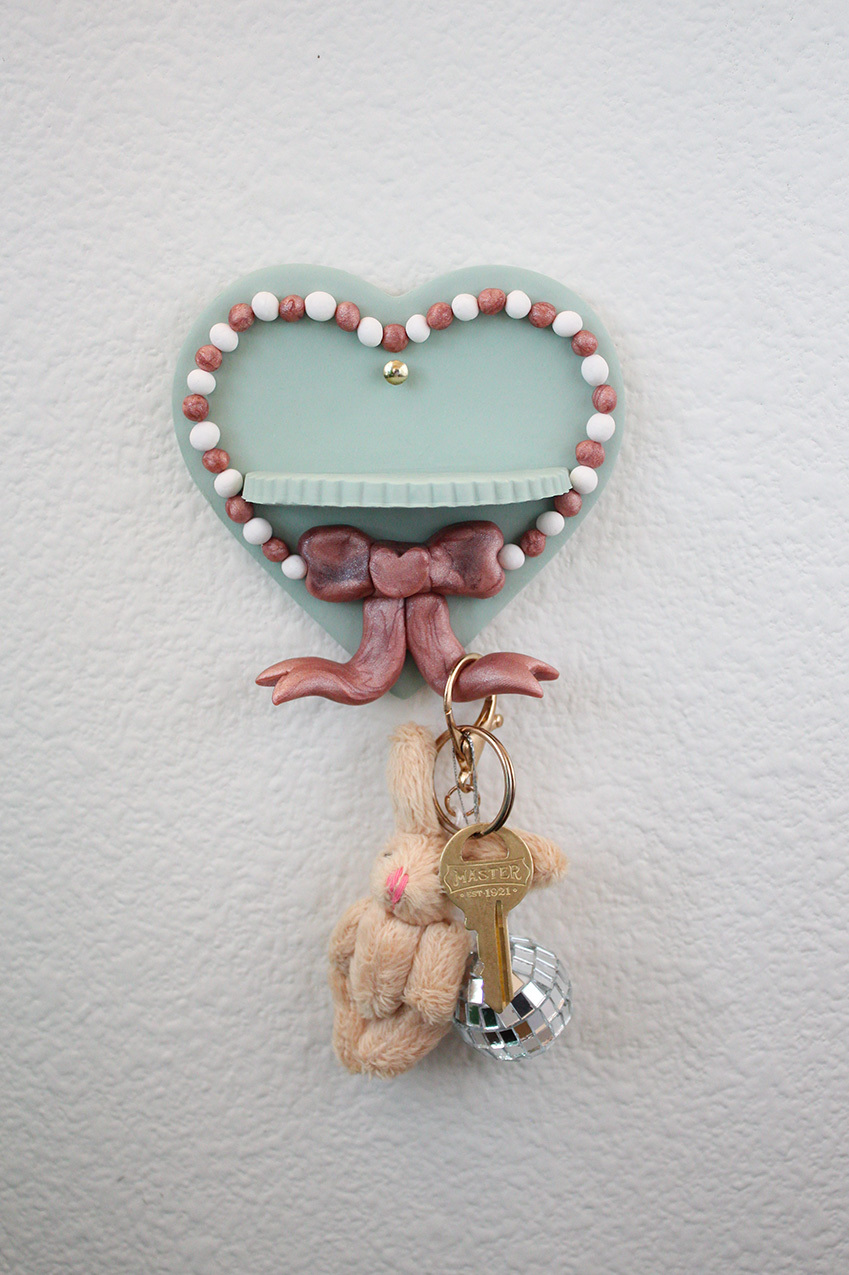
If you've been wanting to create your own cute and functional wall decor, this DIY is definitely for you! Recently, I've been all about creating home decor pieces that align more with my personal style, and Sculpey clay has quickly become one of my favorite mediums for bringing my ideas to life. In case you haven't heard, Sculpey just launched two gorgeous new Premo colors—Sage and Rose Gold Metallic—and I think this trinket shelf and key holder perfectly demonstrates how beautifully these colors complement each other.
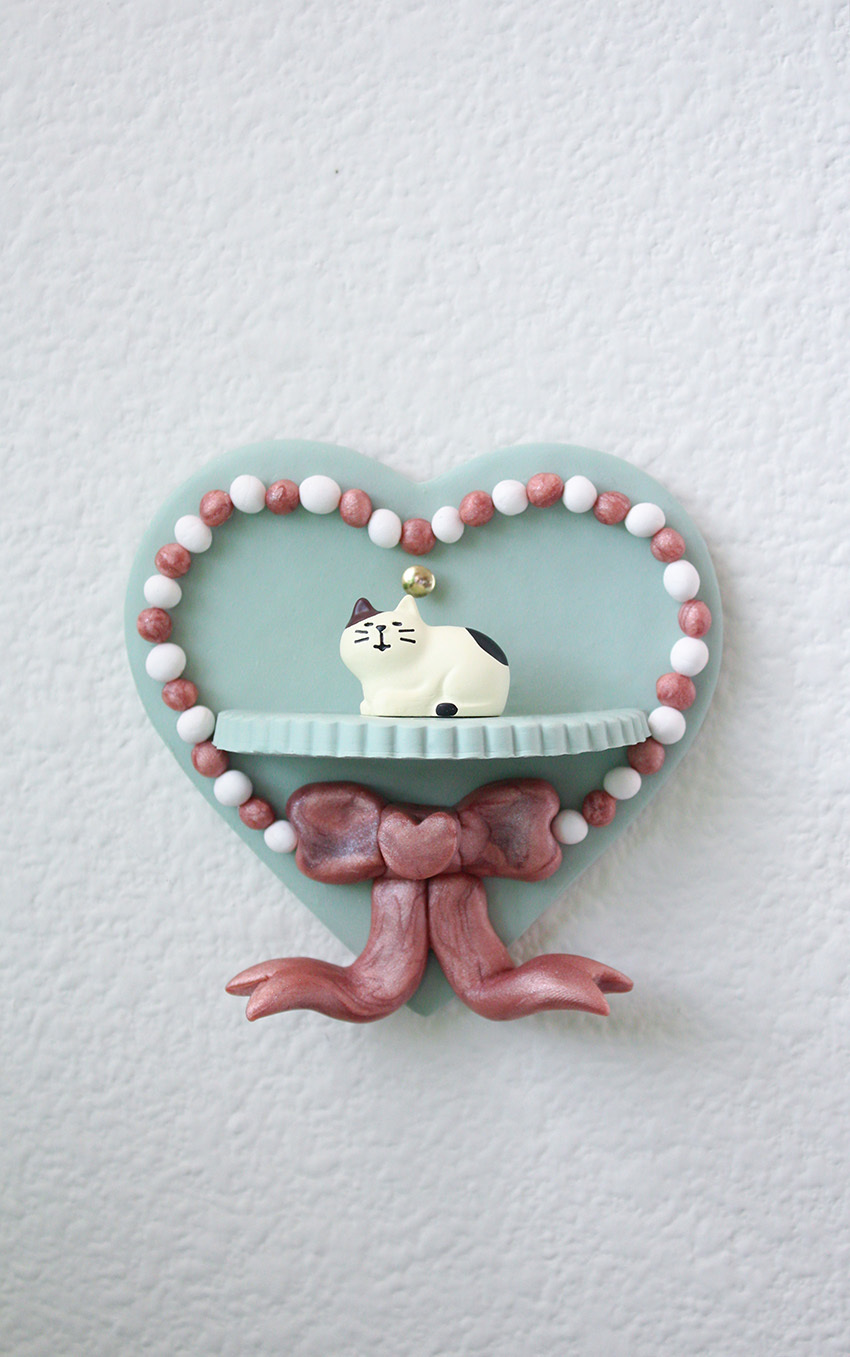
This project is relatively simple, offering a stylish way to display your favorite trinkets and hang up your keys. As a reminder, Sculpey Premo is incredibly durable, flexible, and non-toxic, plus it doesn't air dry! Personally, I'm smitten with that elegant metallic bow, but honestly, I love how this entire piece turned out.
Ready to make your own trinket shelf and key holder? Keep on reading for all the details!
What You'll Need
Sculpey Premo Oven Bake Clay in Sage (2-3 packs)
Sculpey Premo Oven Bake Clay in Rose Gold Metallic (1 pack)
Sculpey Premo Oven Bake Clay in White (1 pack)
Sculpey Tools Oven-Safe Work Mat
Sculpey Tools 8-Inch Acrylic Clay Roller
Sculpey Oven-Bake Clay Adhesive
Large & Mini Heart Cutters
Fluted Circle Cutter
Nail (to hang on wall)
How To
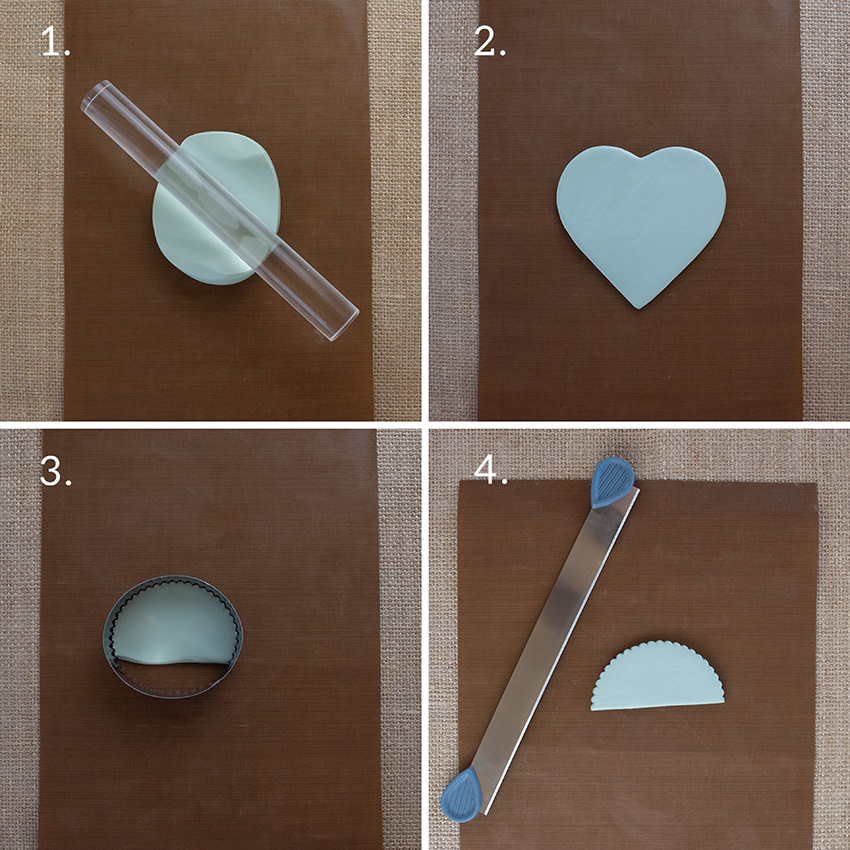 Step 1) Roll out your Sage clay.
Step 2) Cut clay into a heart shape.
Step 3) Use a fluted circle cutter to cut another piece of the Sage clay.
Step 4) Use a clay blade to cut that piece into a half circle (this will create the shelf piece).
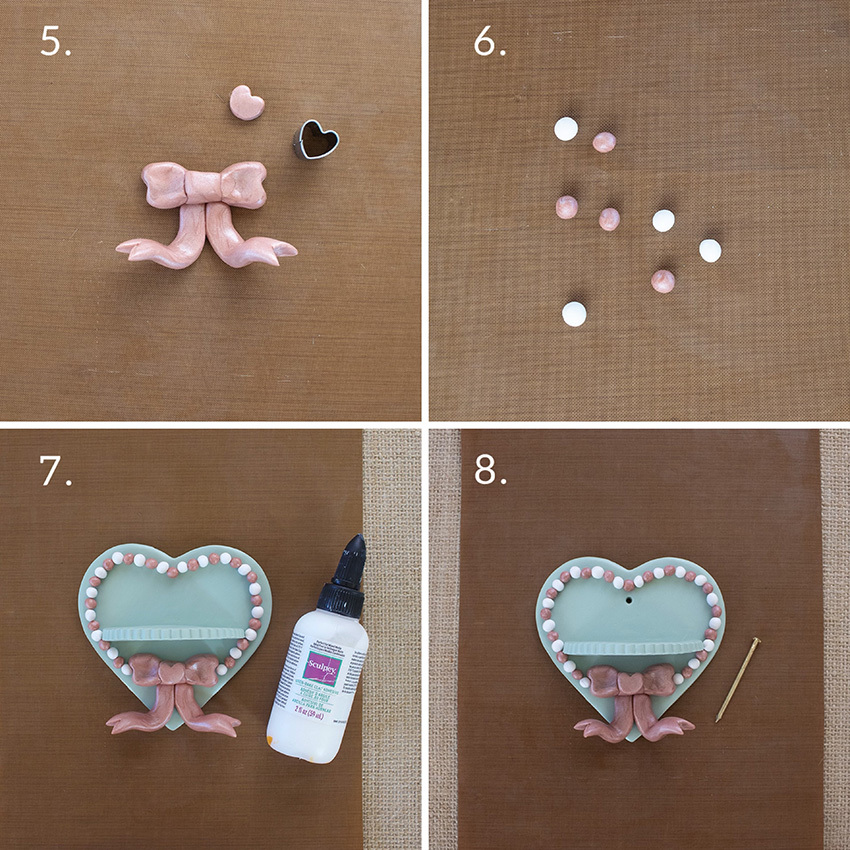
Step 5) Create a bow using the Rose Gold Metallic clay. Use a mini heart cutter to create a mini heart to go on top of the bow.
Step 6) Roll mini balls out of the Rose Gold Metallic and White clay.
Step 7) Arrange the pieces together to visualize and then use Sculpey Oven-Bake Clay Adhesive to glue the pieces together.
Step 8) Create a hole for a nail to go through and then bake the clay according to package instructions.
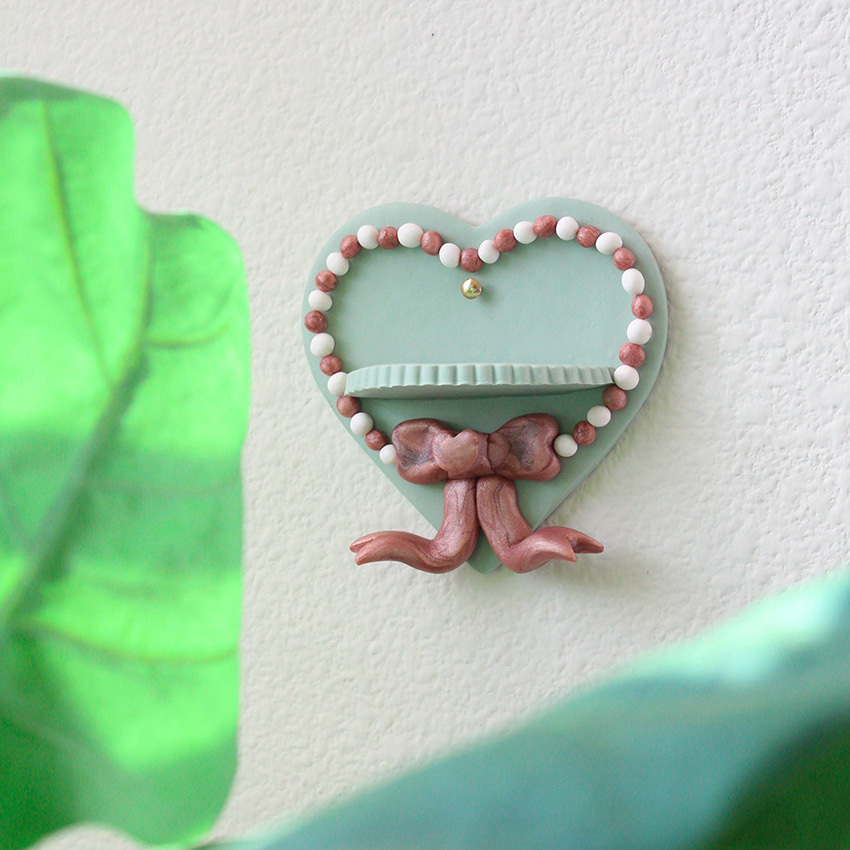
Hang up your beautiful, new wall decor and display your favorite small trinkets and keys! Happy Making!


Comments: