


DIY Clay Magnets with Sculpey III
This is a sponsored post written by me on behalf of Polyform Products. All opinions are 100% my own.
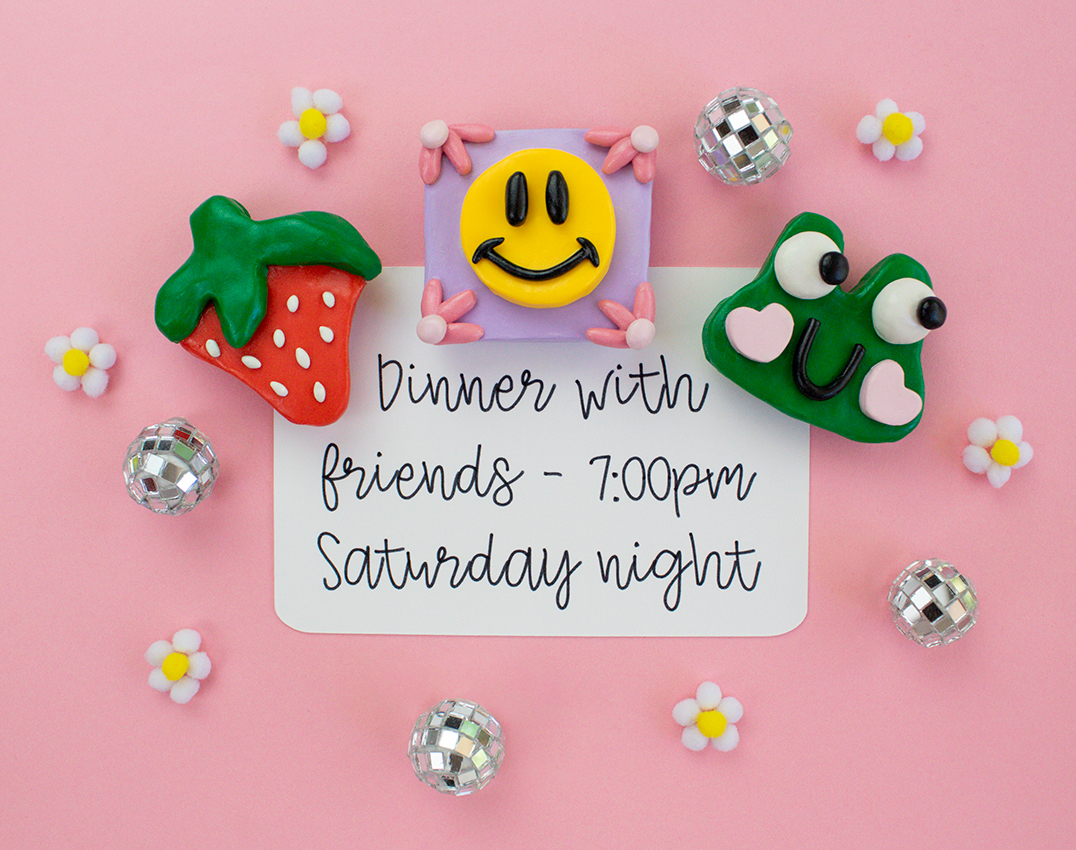
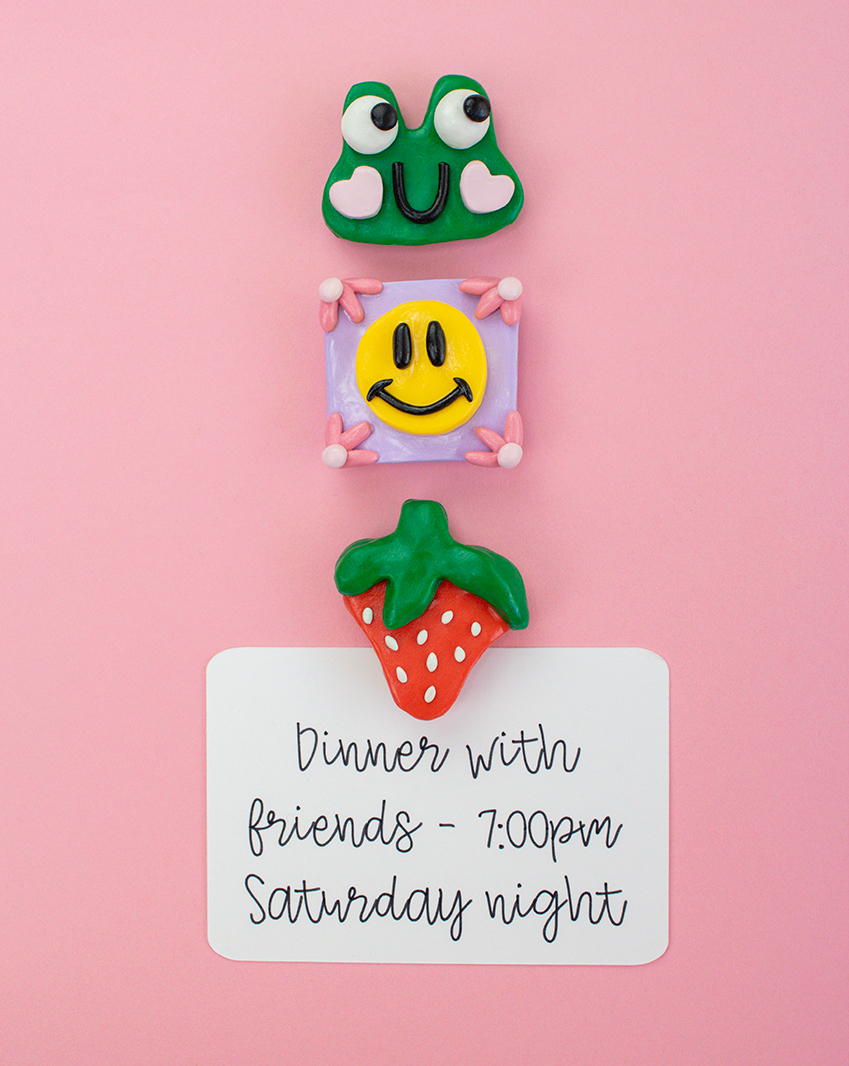
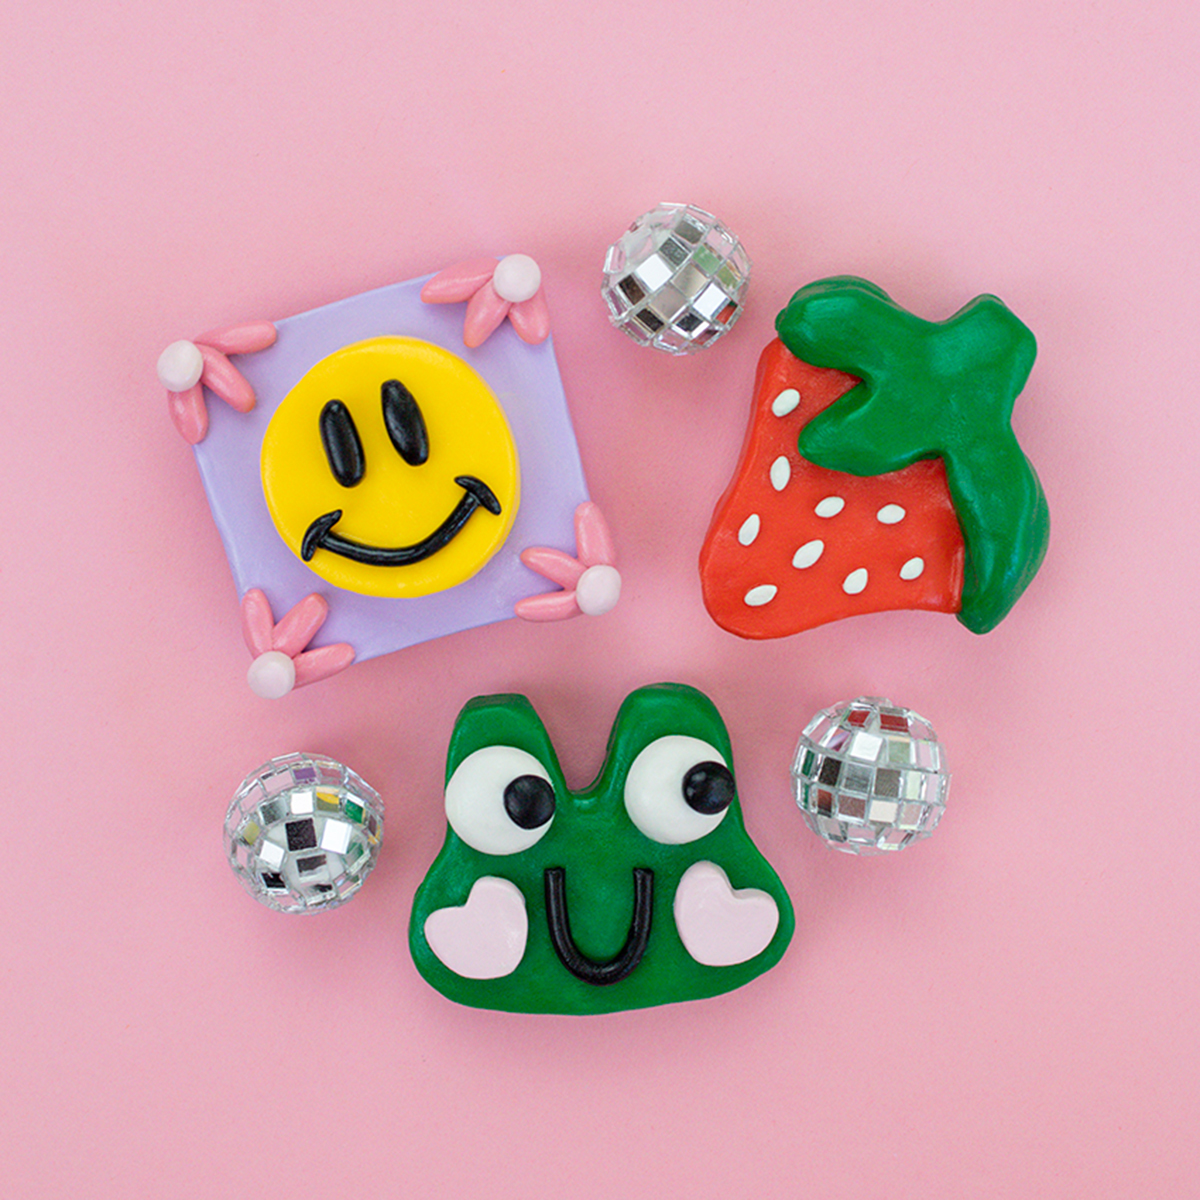
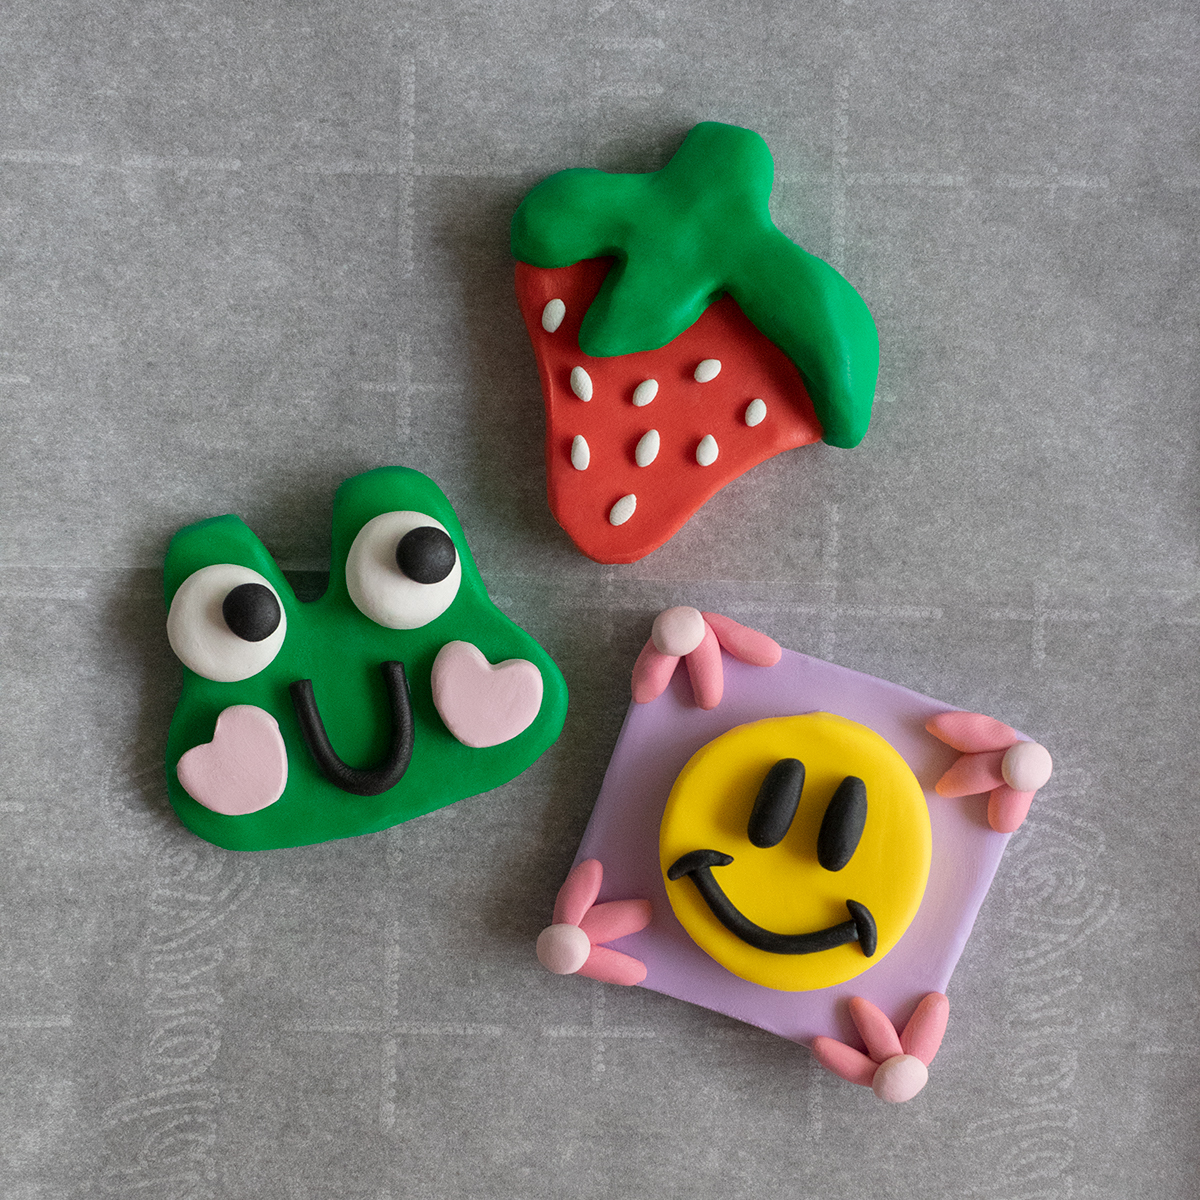
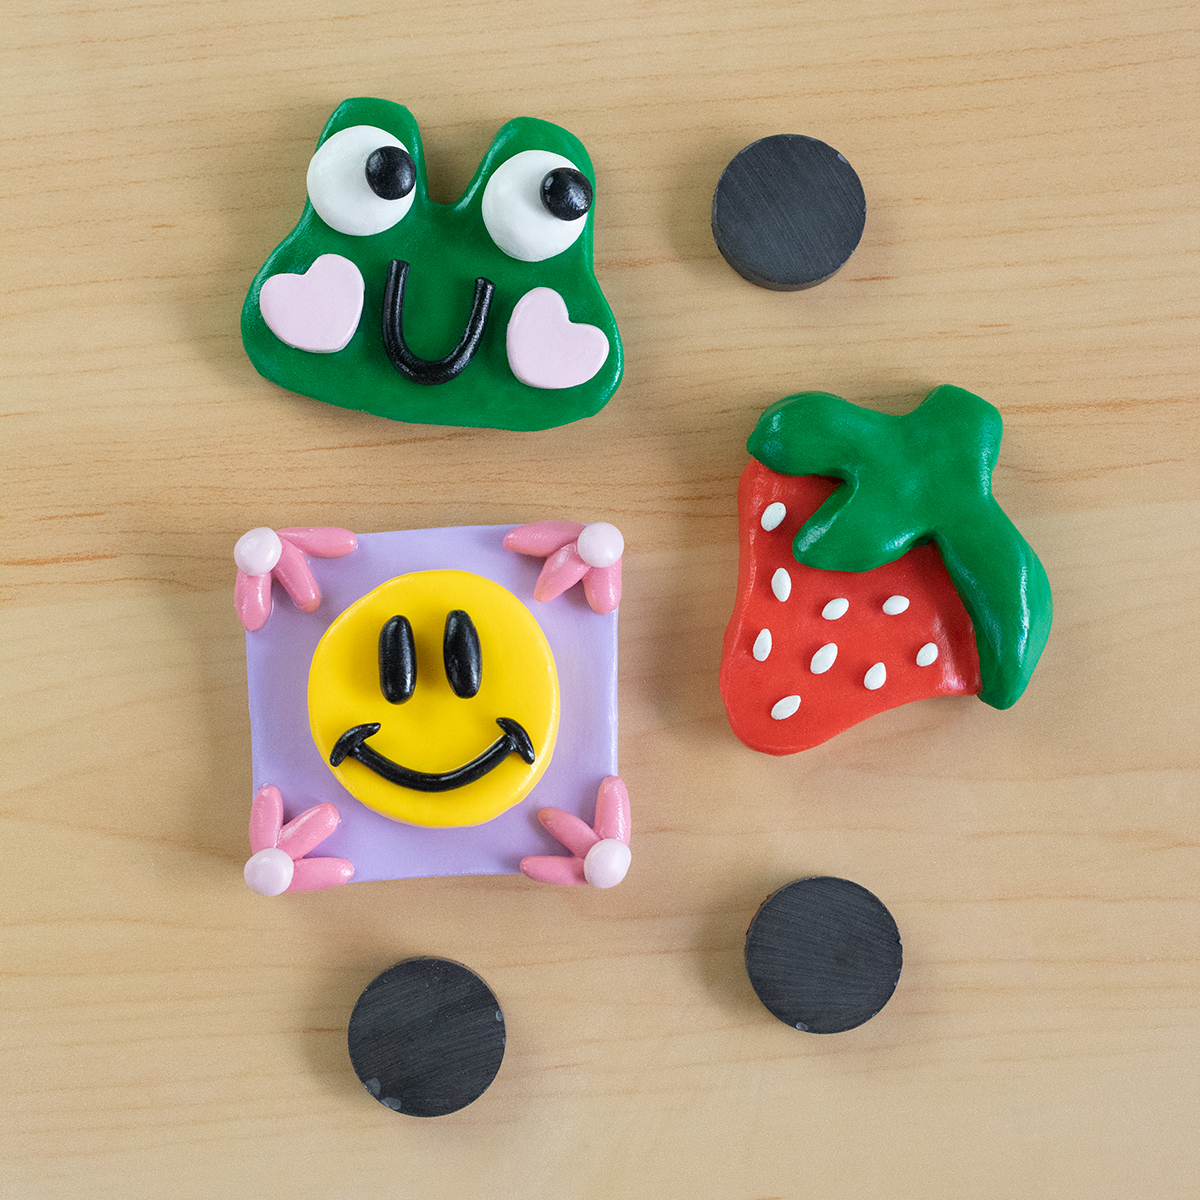
Clay is by far one of my favorite mediums to work with because you can sculpt just about anything with it. Literally. I had so much fun working with Sculpey III clay to craft up these adorable magnets that practically scream summer! Each one is special to me, but if I had to pick a favorite - I'd have to say that the frog really speaks to me. 😆 What can I say, those little heart cheeks are just too cute!
I love that Sculpey III comes in a wide variety of colors so no painting is needed for this project. The clay is soft and very easy to work with and best of all, it stays that way until you bake it! Yeah, that's definitely my favorite thing about it. No air drying means I can take my time with my designs with no added stress.
This project makes for a great summer craft and feel free to let your imagination soar beyond these 3 designs! Sculpey III is also safe and non-toxic so it's perfect for beginners who are new to working with clay.
Keep on reading to learn how to make your own clay magnets, too!
What You'll Need
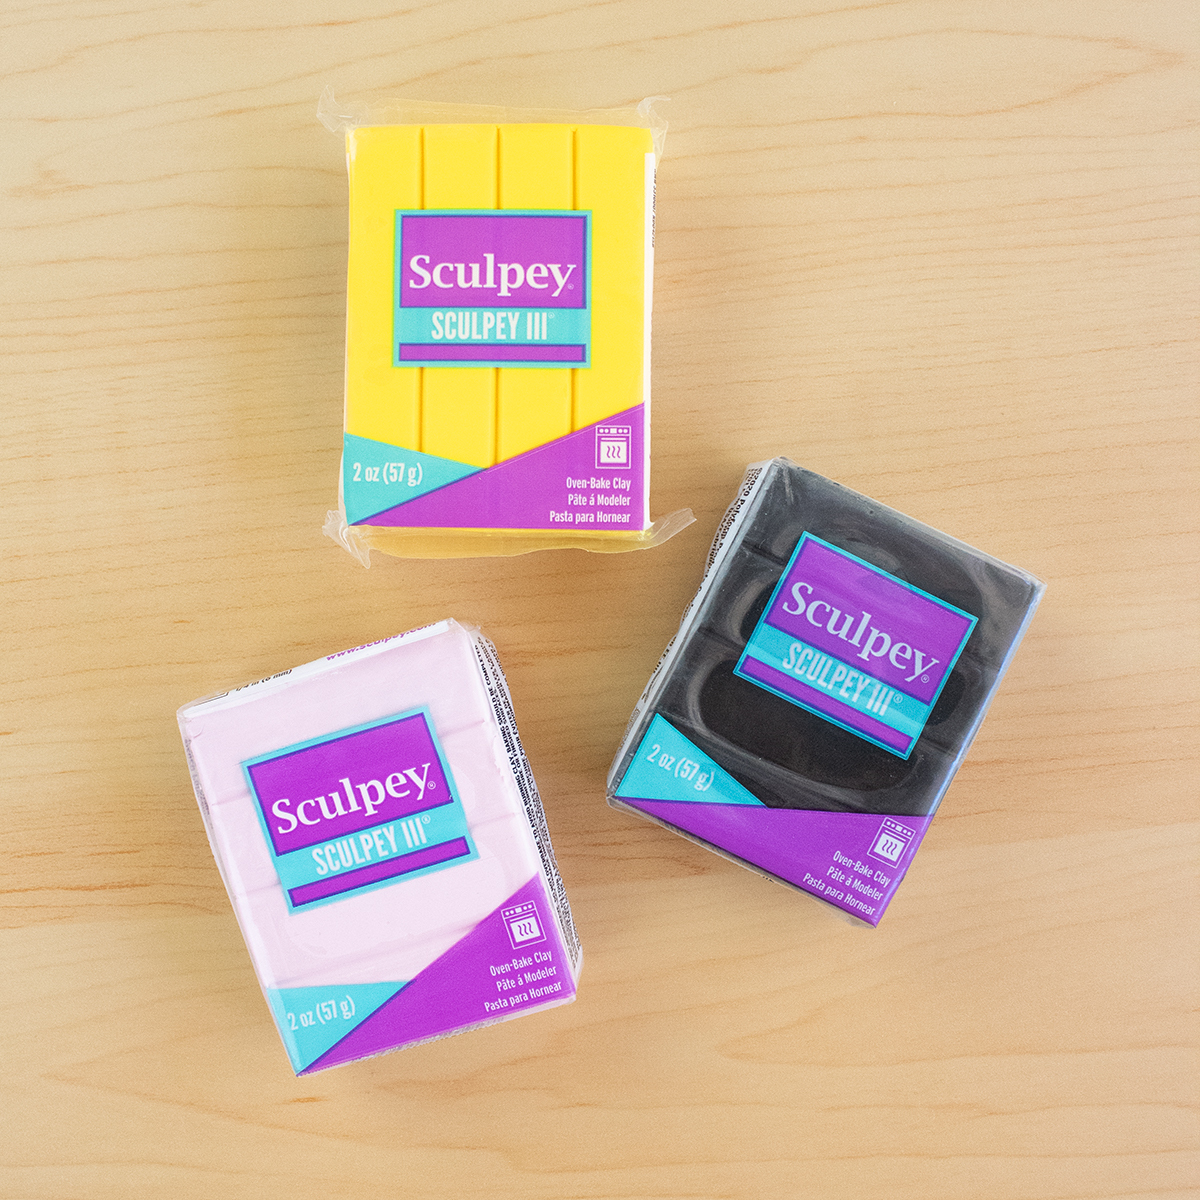
Frog Colors - Emerald, White, Black, Ballerina
Strawberry Colors - Poppy, Emerald, White
Happy Face Colors - Spring Lilac, Dusty Rose, Ballerina, Yellow, Black
Gloss Glaze + Brush
Magnets + Glue
Optional: Cotton Swabs + Rubbing Alcohol (to remove any unwanted dust/lint)
How To
Frog:
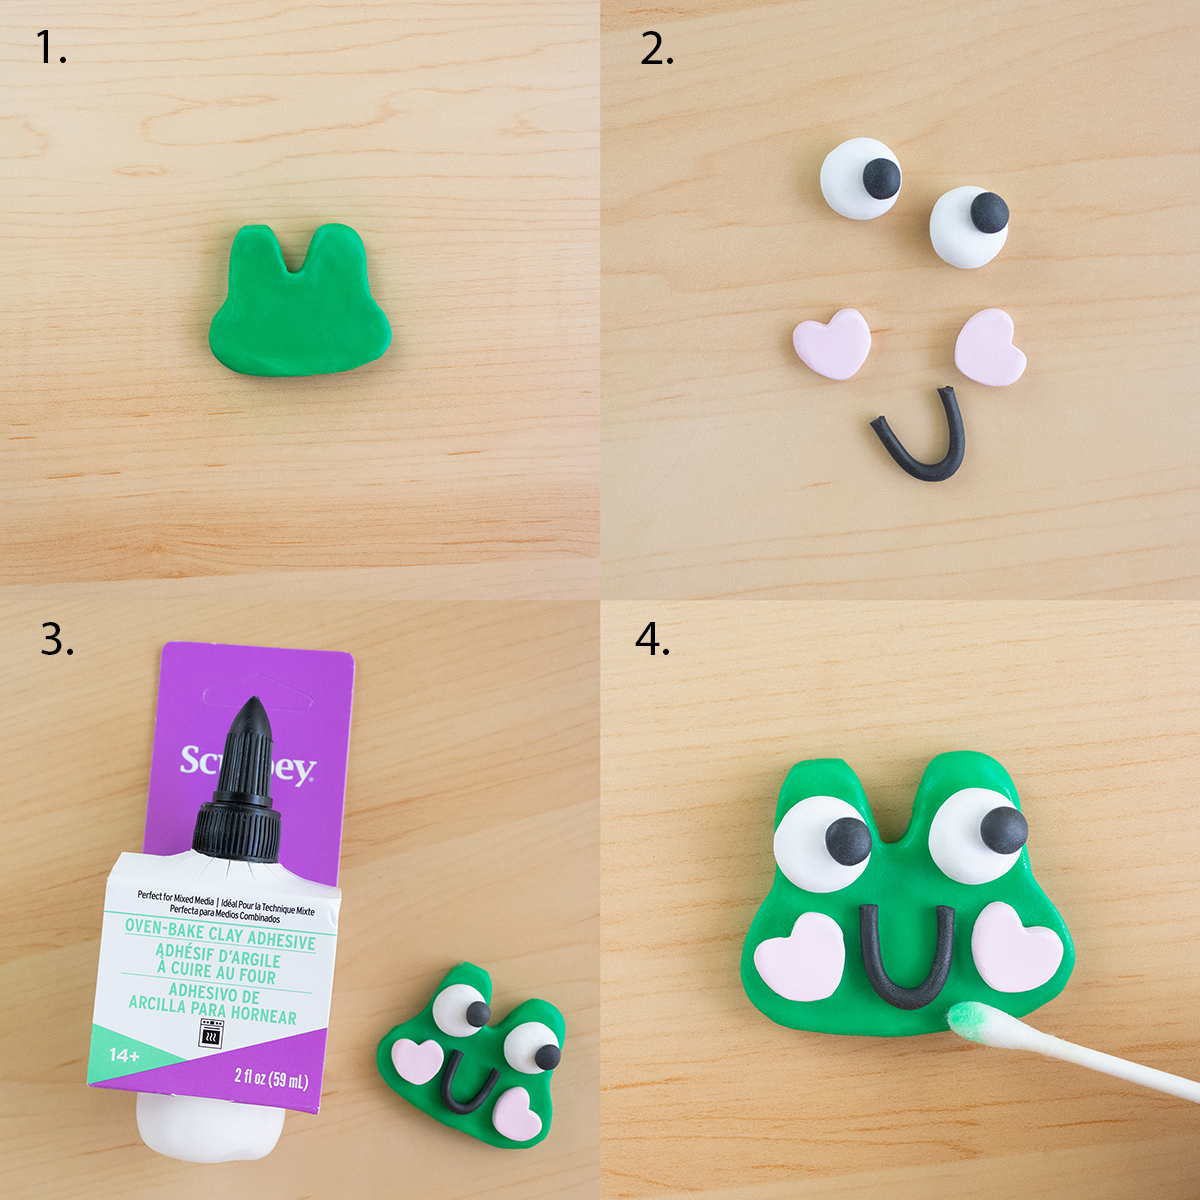
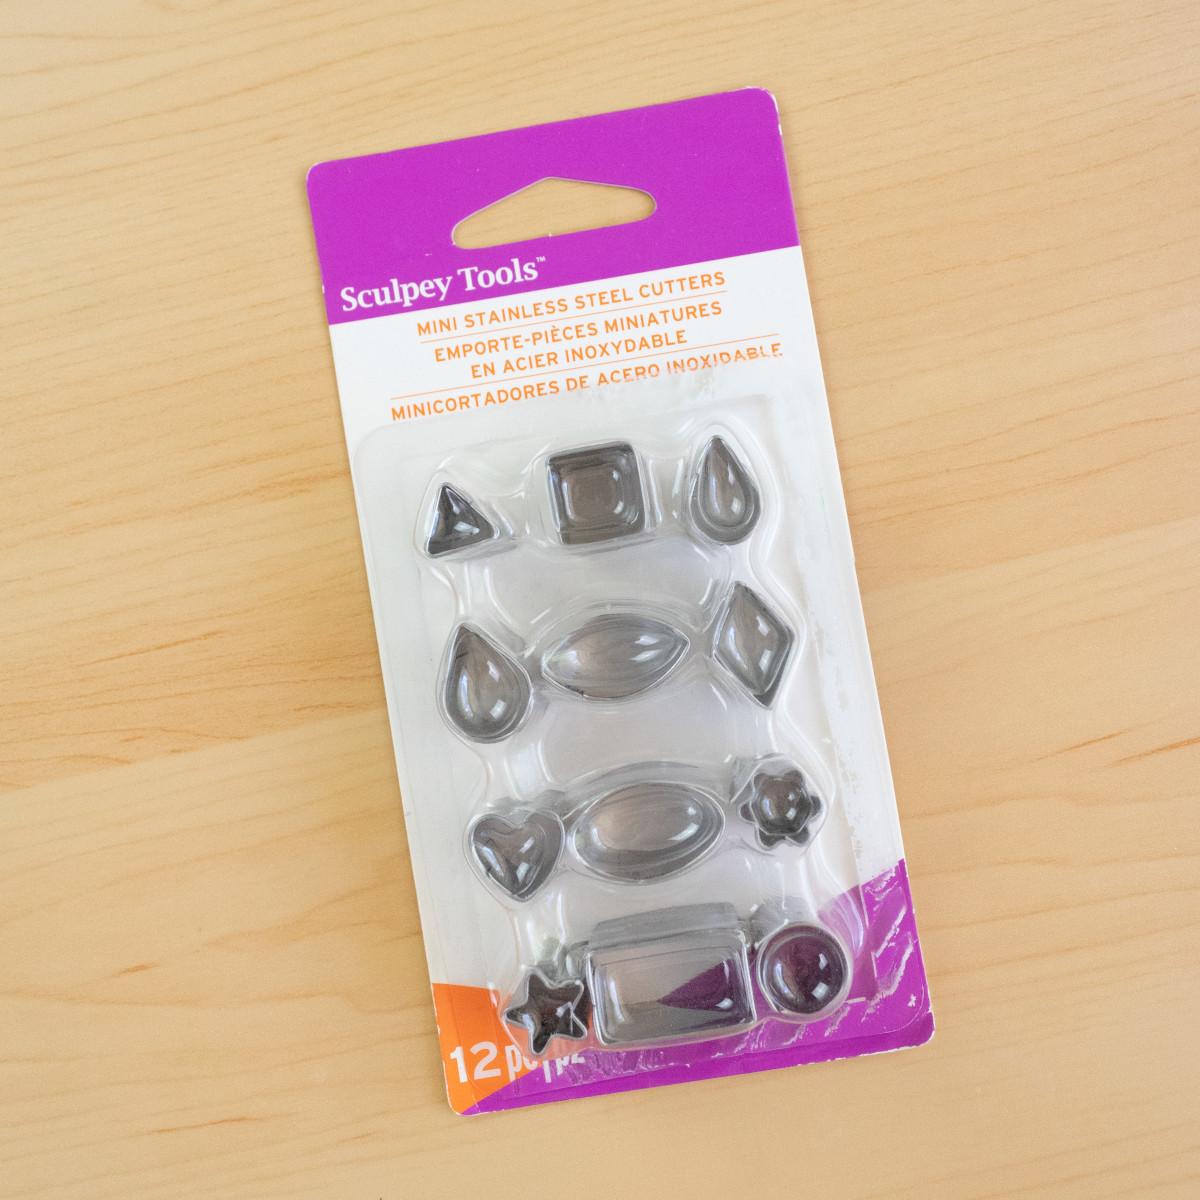
Begin by rolling out your emerald clay and creating the shape of a frog's head. Use your mini heart and circle cutters to make the eyes (white) and cheeks (ballerina). Then, roll out your black clay to make the mouth and dots for the eyes. Attach these pieces to the frog's head using your clay adhesive.
Continue making the rest of your magnets or skip to the section titled Bake Your Pieces below for further steps!
Tip: Use a cotton swab and some rubbing alcohol to remove any lint or small impurities from your clay. Allow to dry completely before baking.
Strawberry:

Roll out your poppy clay and create a strawberry shape from it. Then, using your emerald clay, build a stem on top of your strawberry. Use your fingers to create a smooth finish. Create small white seeds with your white clay and add them to your strawberry. You can press the seeds in or use clay adhesive for this.
Continue to make the last magnet or skip to the section titled Bake Your Pieces below for further steps!
Happy Face:
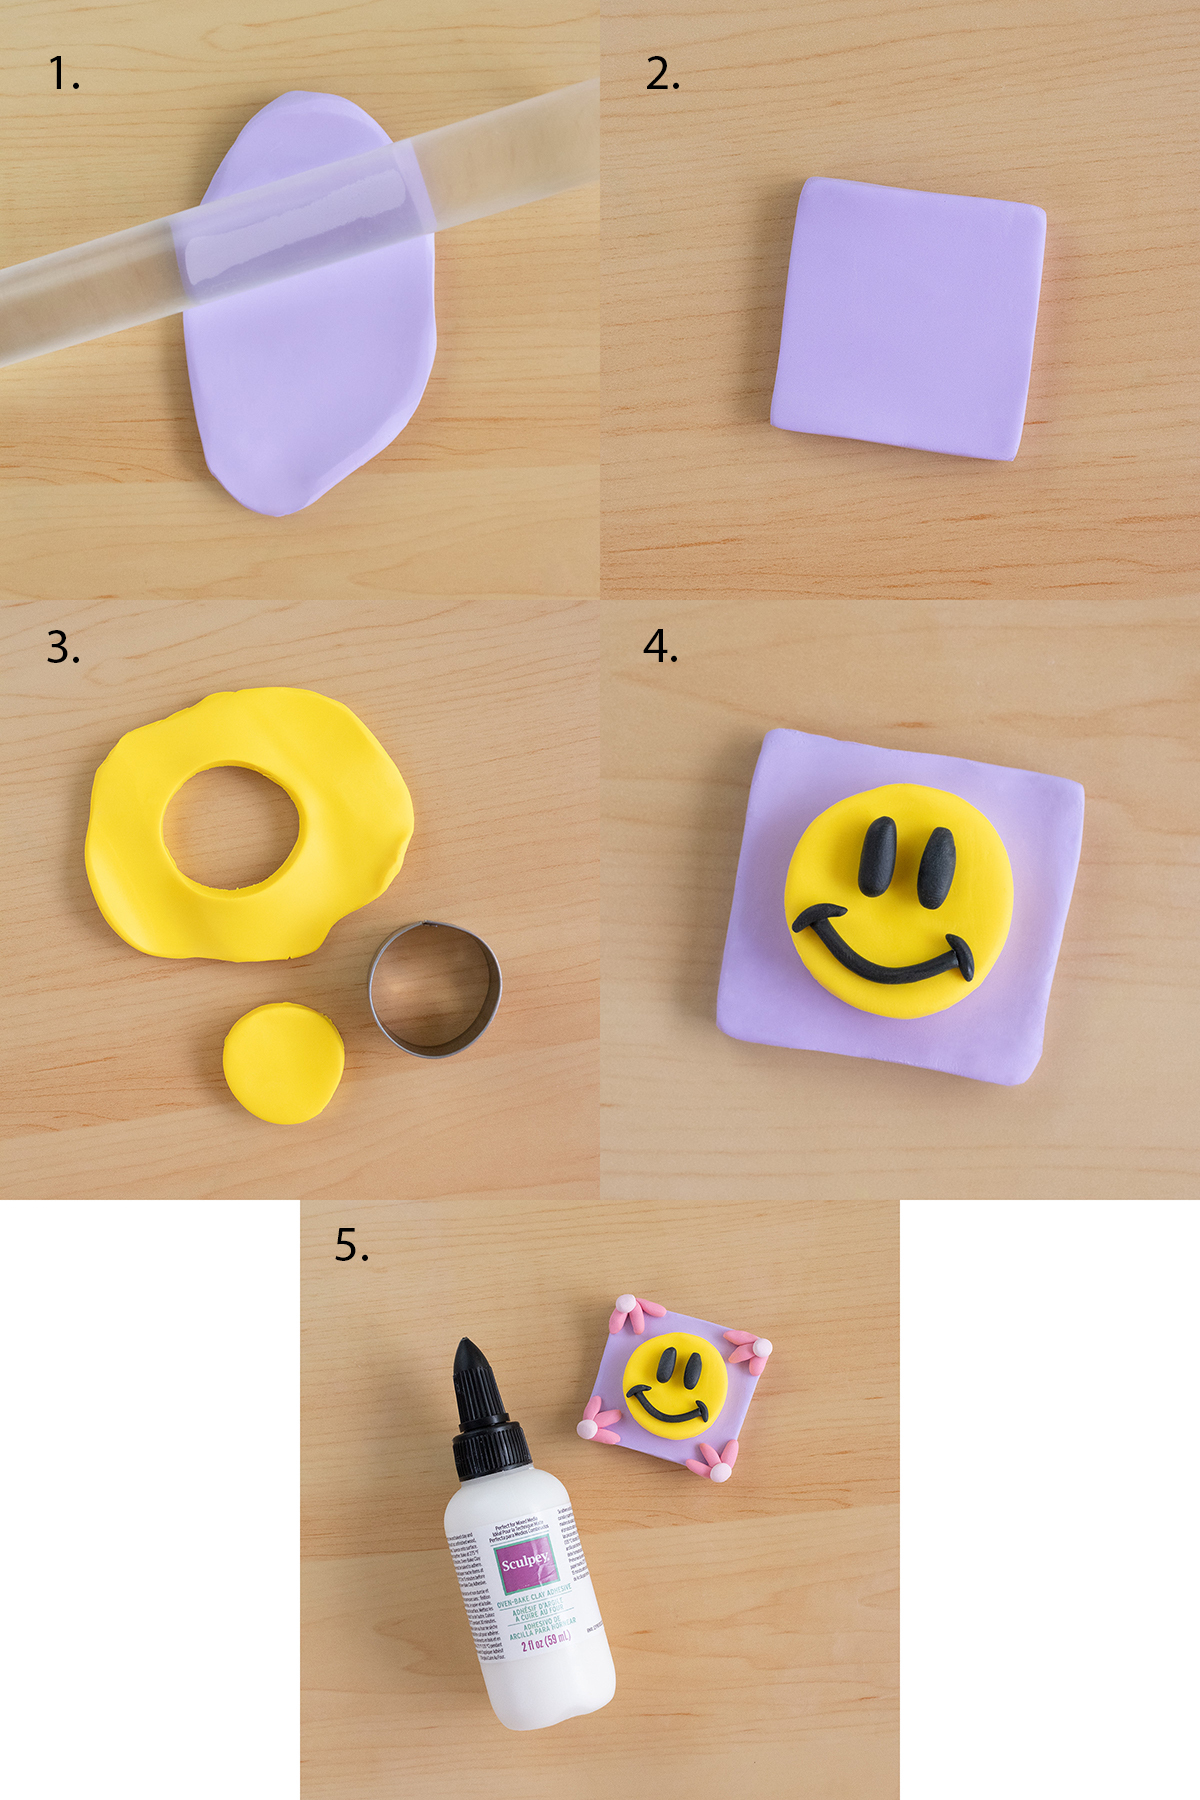
Roll out your spring lilac clay and cut it into a square shape. Use your fingers to smooth and even it out. Then, roll out your yellow clay and use a small circle cutter to create your smiley face. Using black clay, make the details of the face (eyes and mouth).
Create small flower embellishments on each of the square's corners using ballerina and dusty rose. Use your clay adhesive to attach all of the pieces together.
Bake Your Pieces
Bake your pieces at 275° F for 15 minutes.
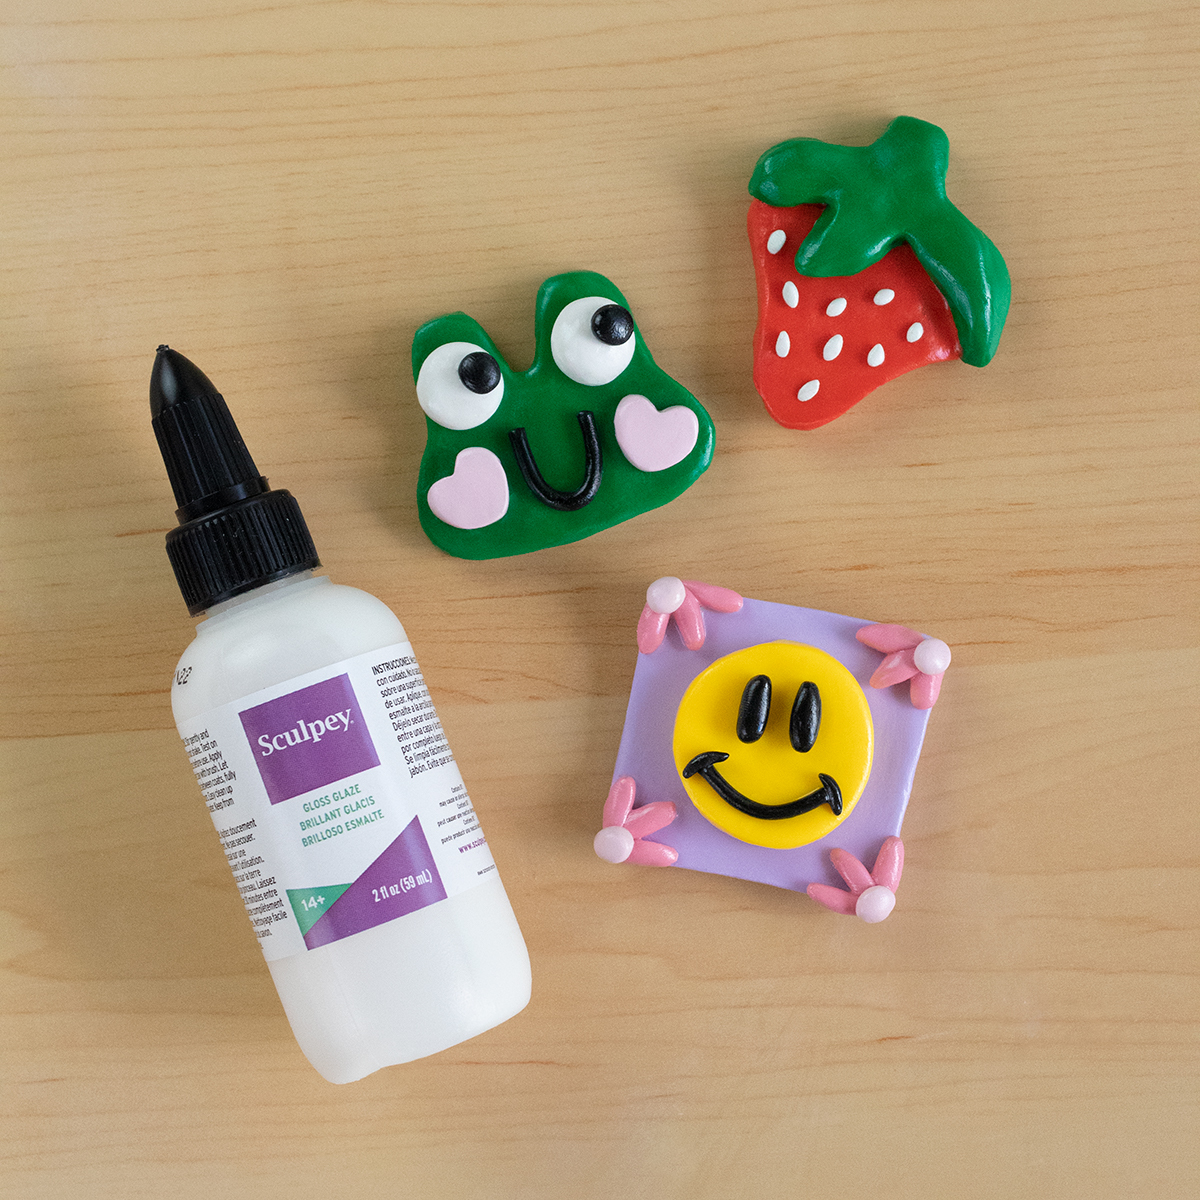
Once your pieces have cooled, add gloss glaze for a shiny finish.
When your pieces have dried, glue a magnet to the back of each of one.
And that's all there is to it! Happy crafting!


Comments: